

I am so excited to share this latest project. When I heard that Art Gallery Fabrics was hosting a bag making contest with April Rhodes’s new line I jumped at the chance to throw my hat in the ring. For starters, April’s fabric designs are beautiful and totally my style. Follow that up with the feel and quality of Art Gallery’s products and it was a no-brainer. This was the perfect prompt to spark my creative bag-making flow.
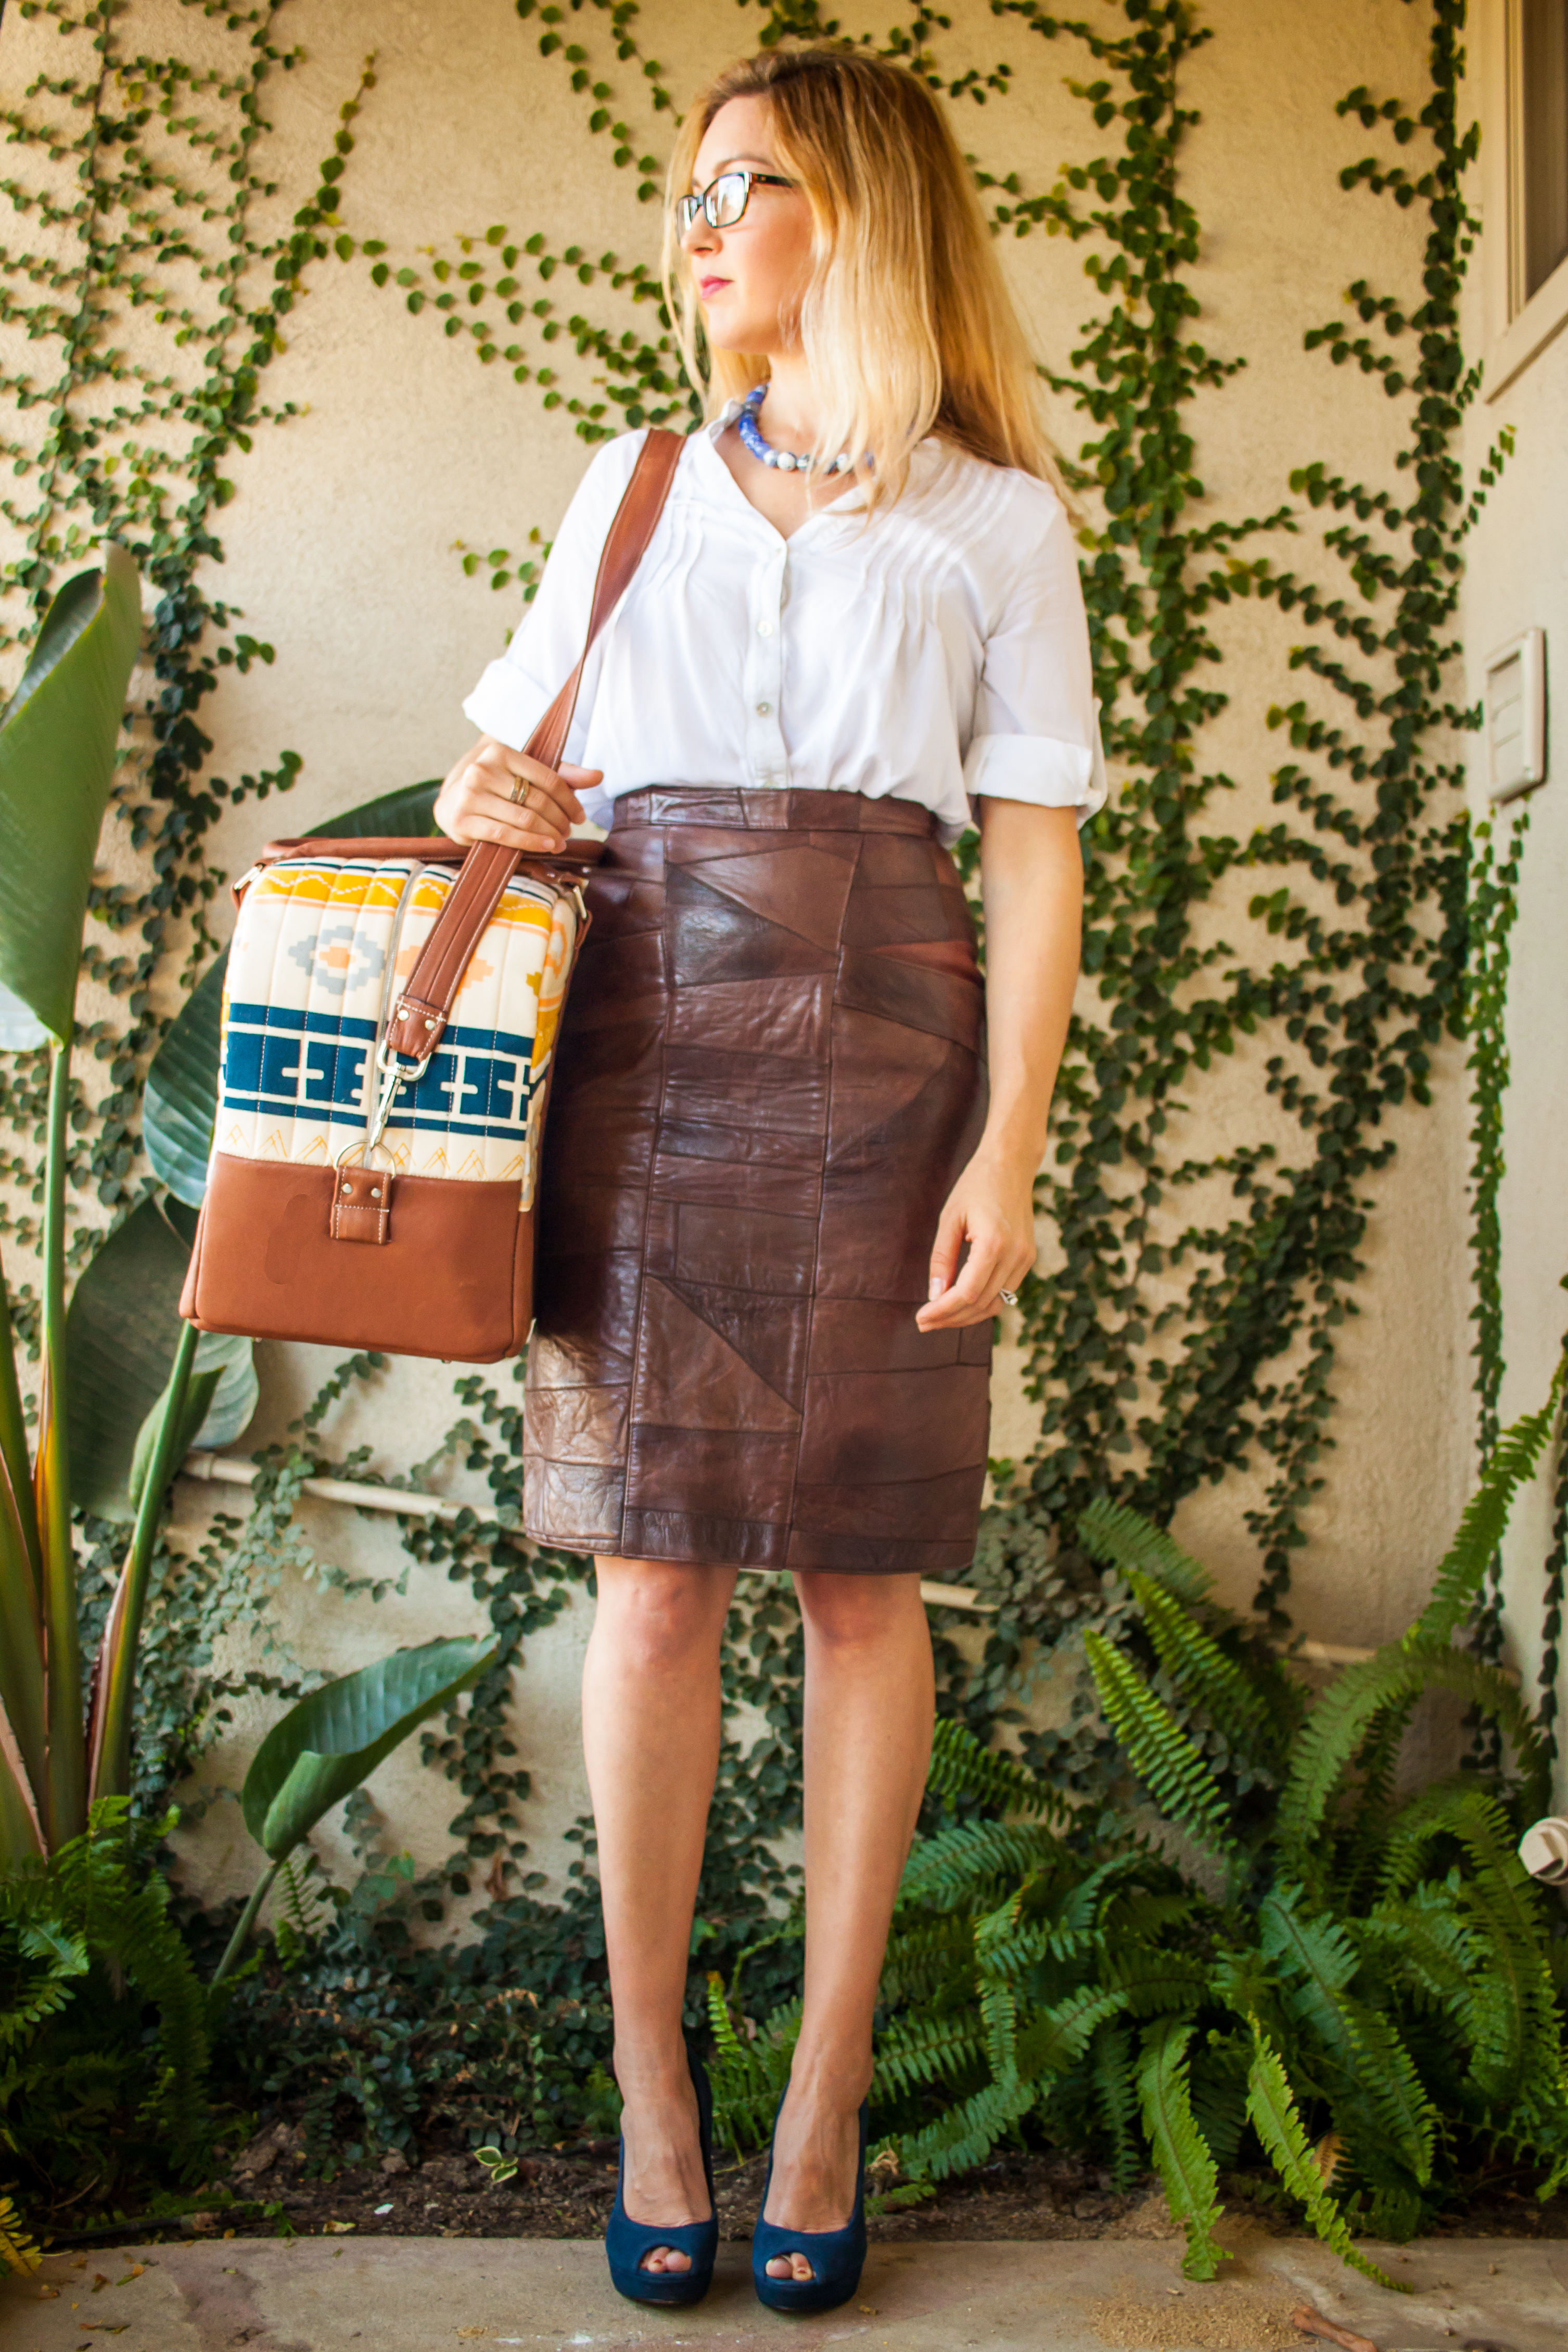
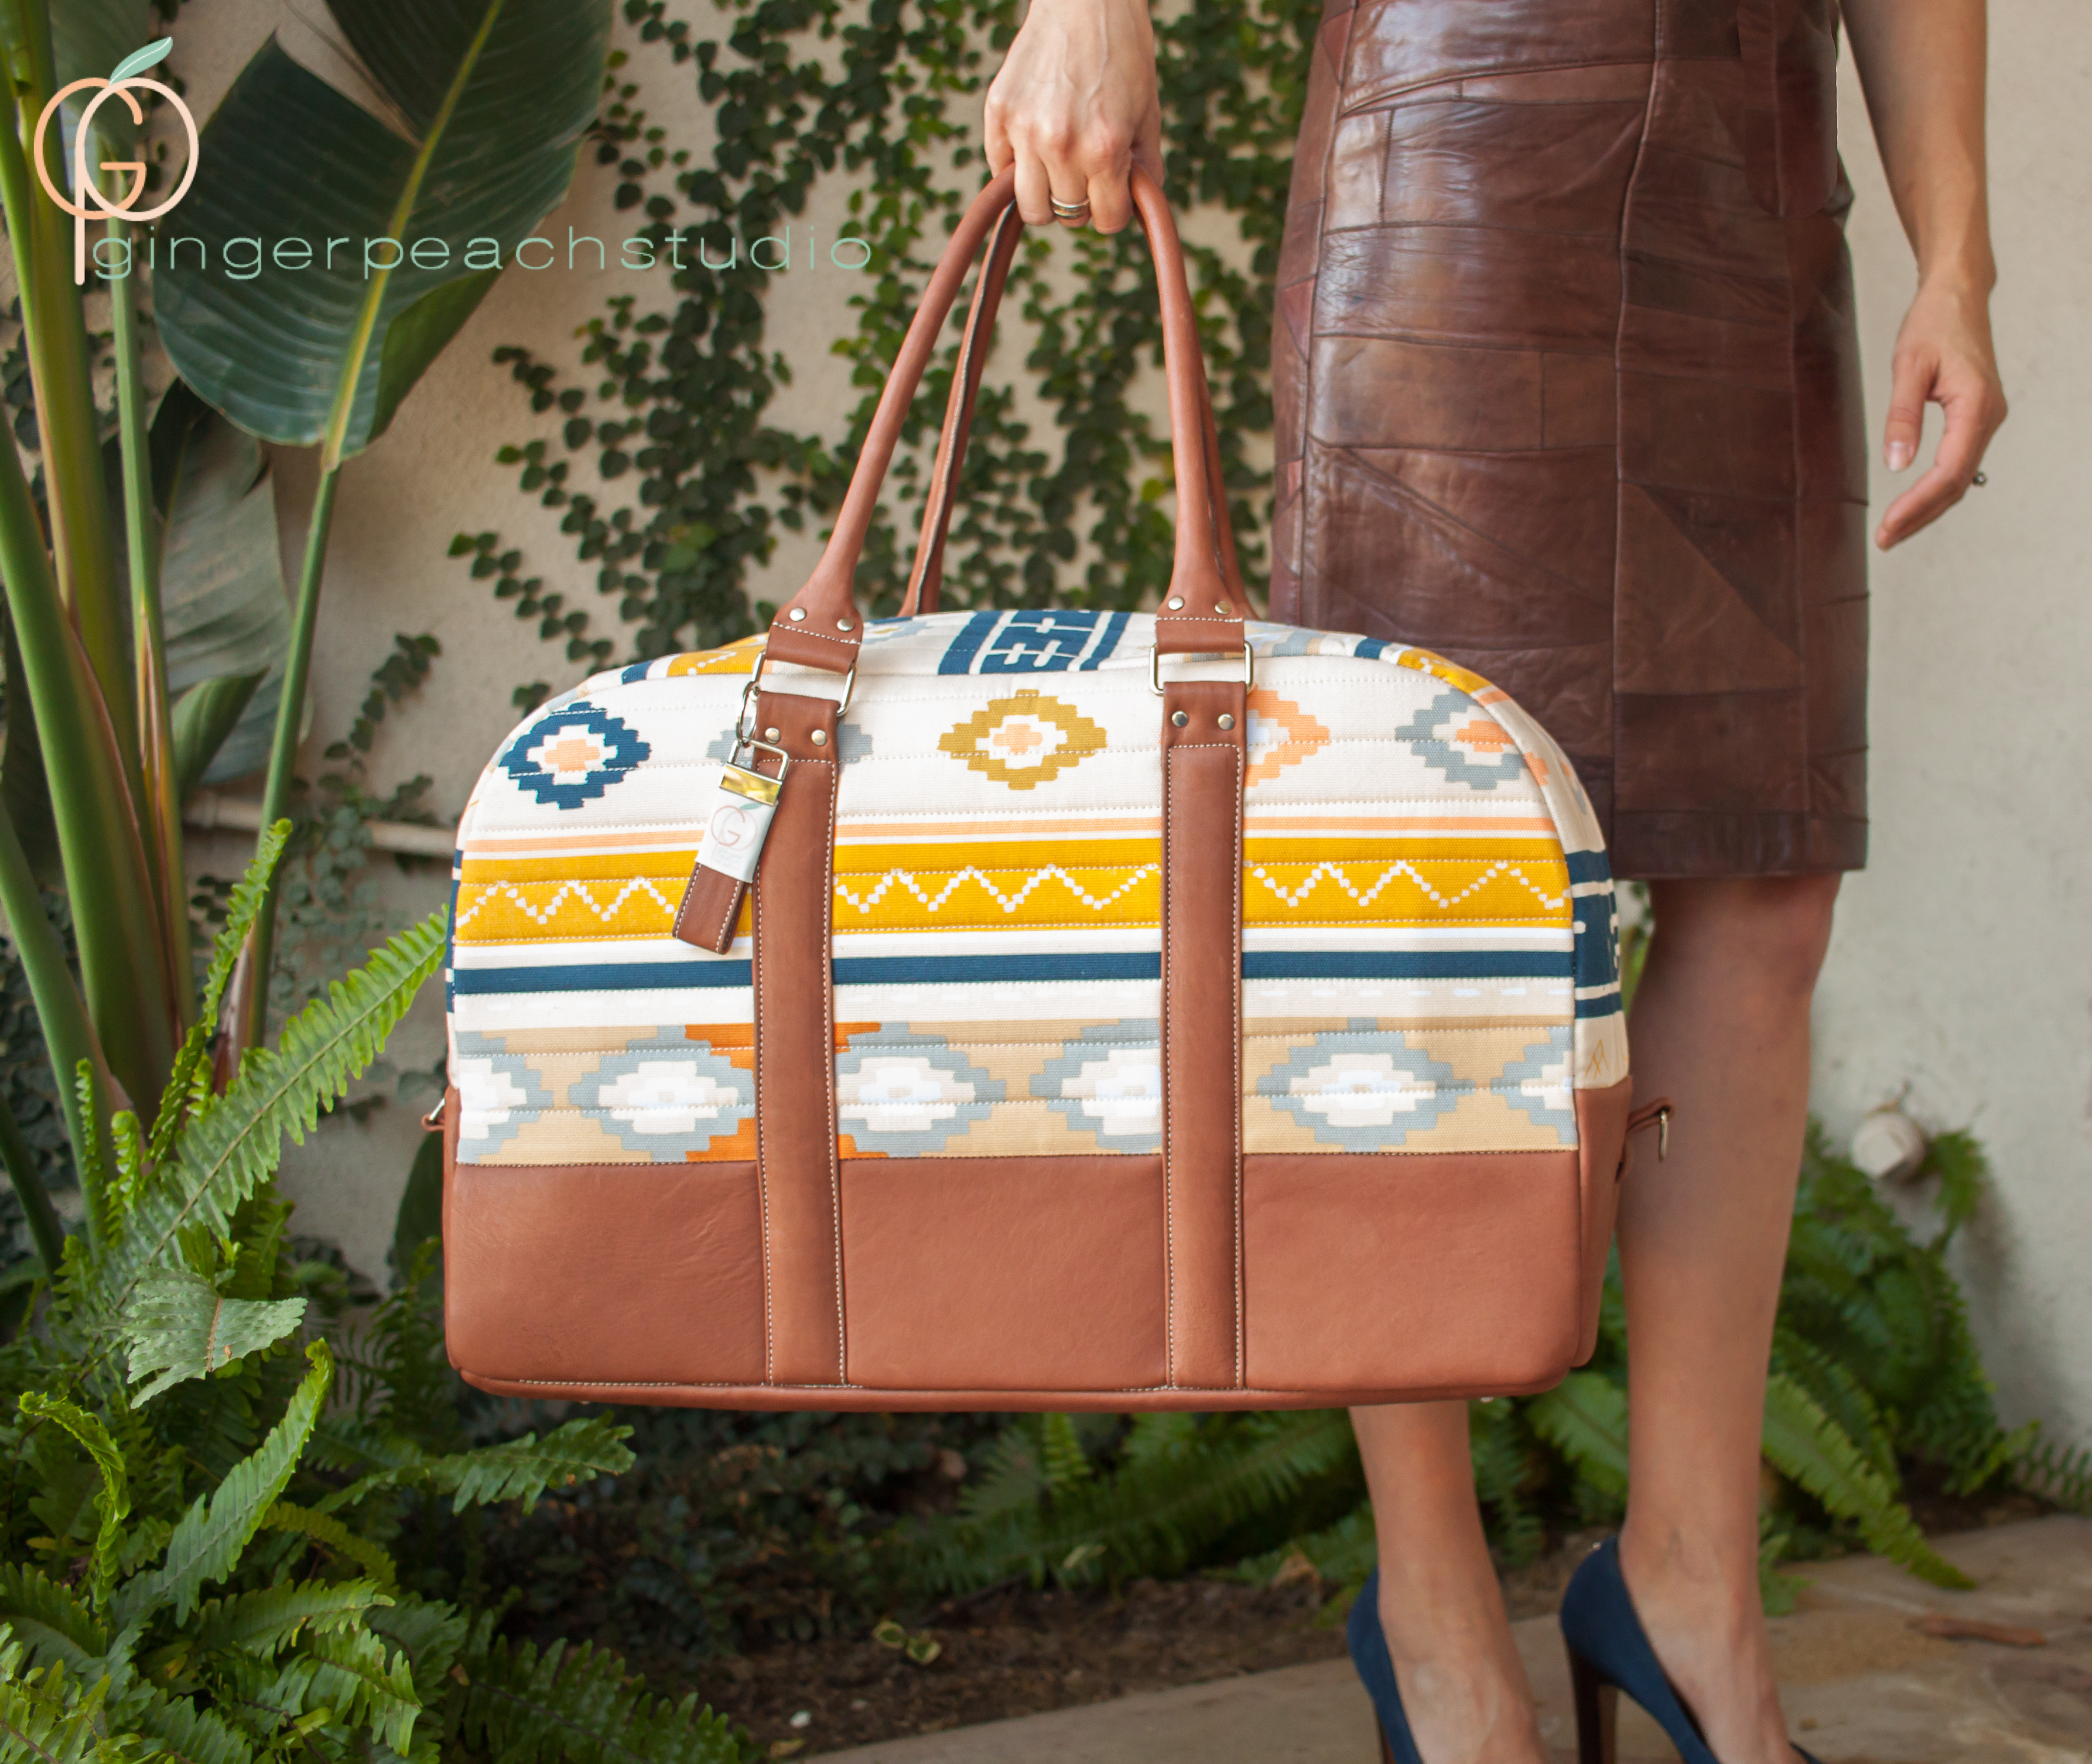
I am so pleased with how this bag turned out. It is everything I need in a weekender. The interior of the bag is very roomy with plenty of space for 3-4 days worth of clothes and 1-2 pairs of shoes. The pockets around the interior bottom are big enough to hold things like undergarments, socks, accessories, and more. The addition of the large detachable strap makes it comfortable to carry on my shoulder, or it can be carried buy the leather handles attached at each side. A tutorial for making your own leather wrapped bag handles such as this is in the works so stay tuned for that.
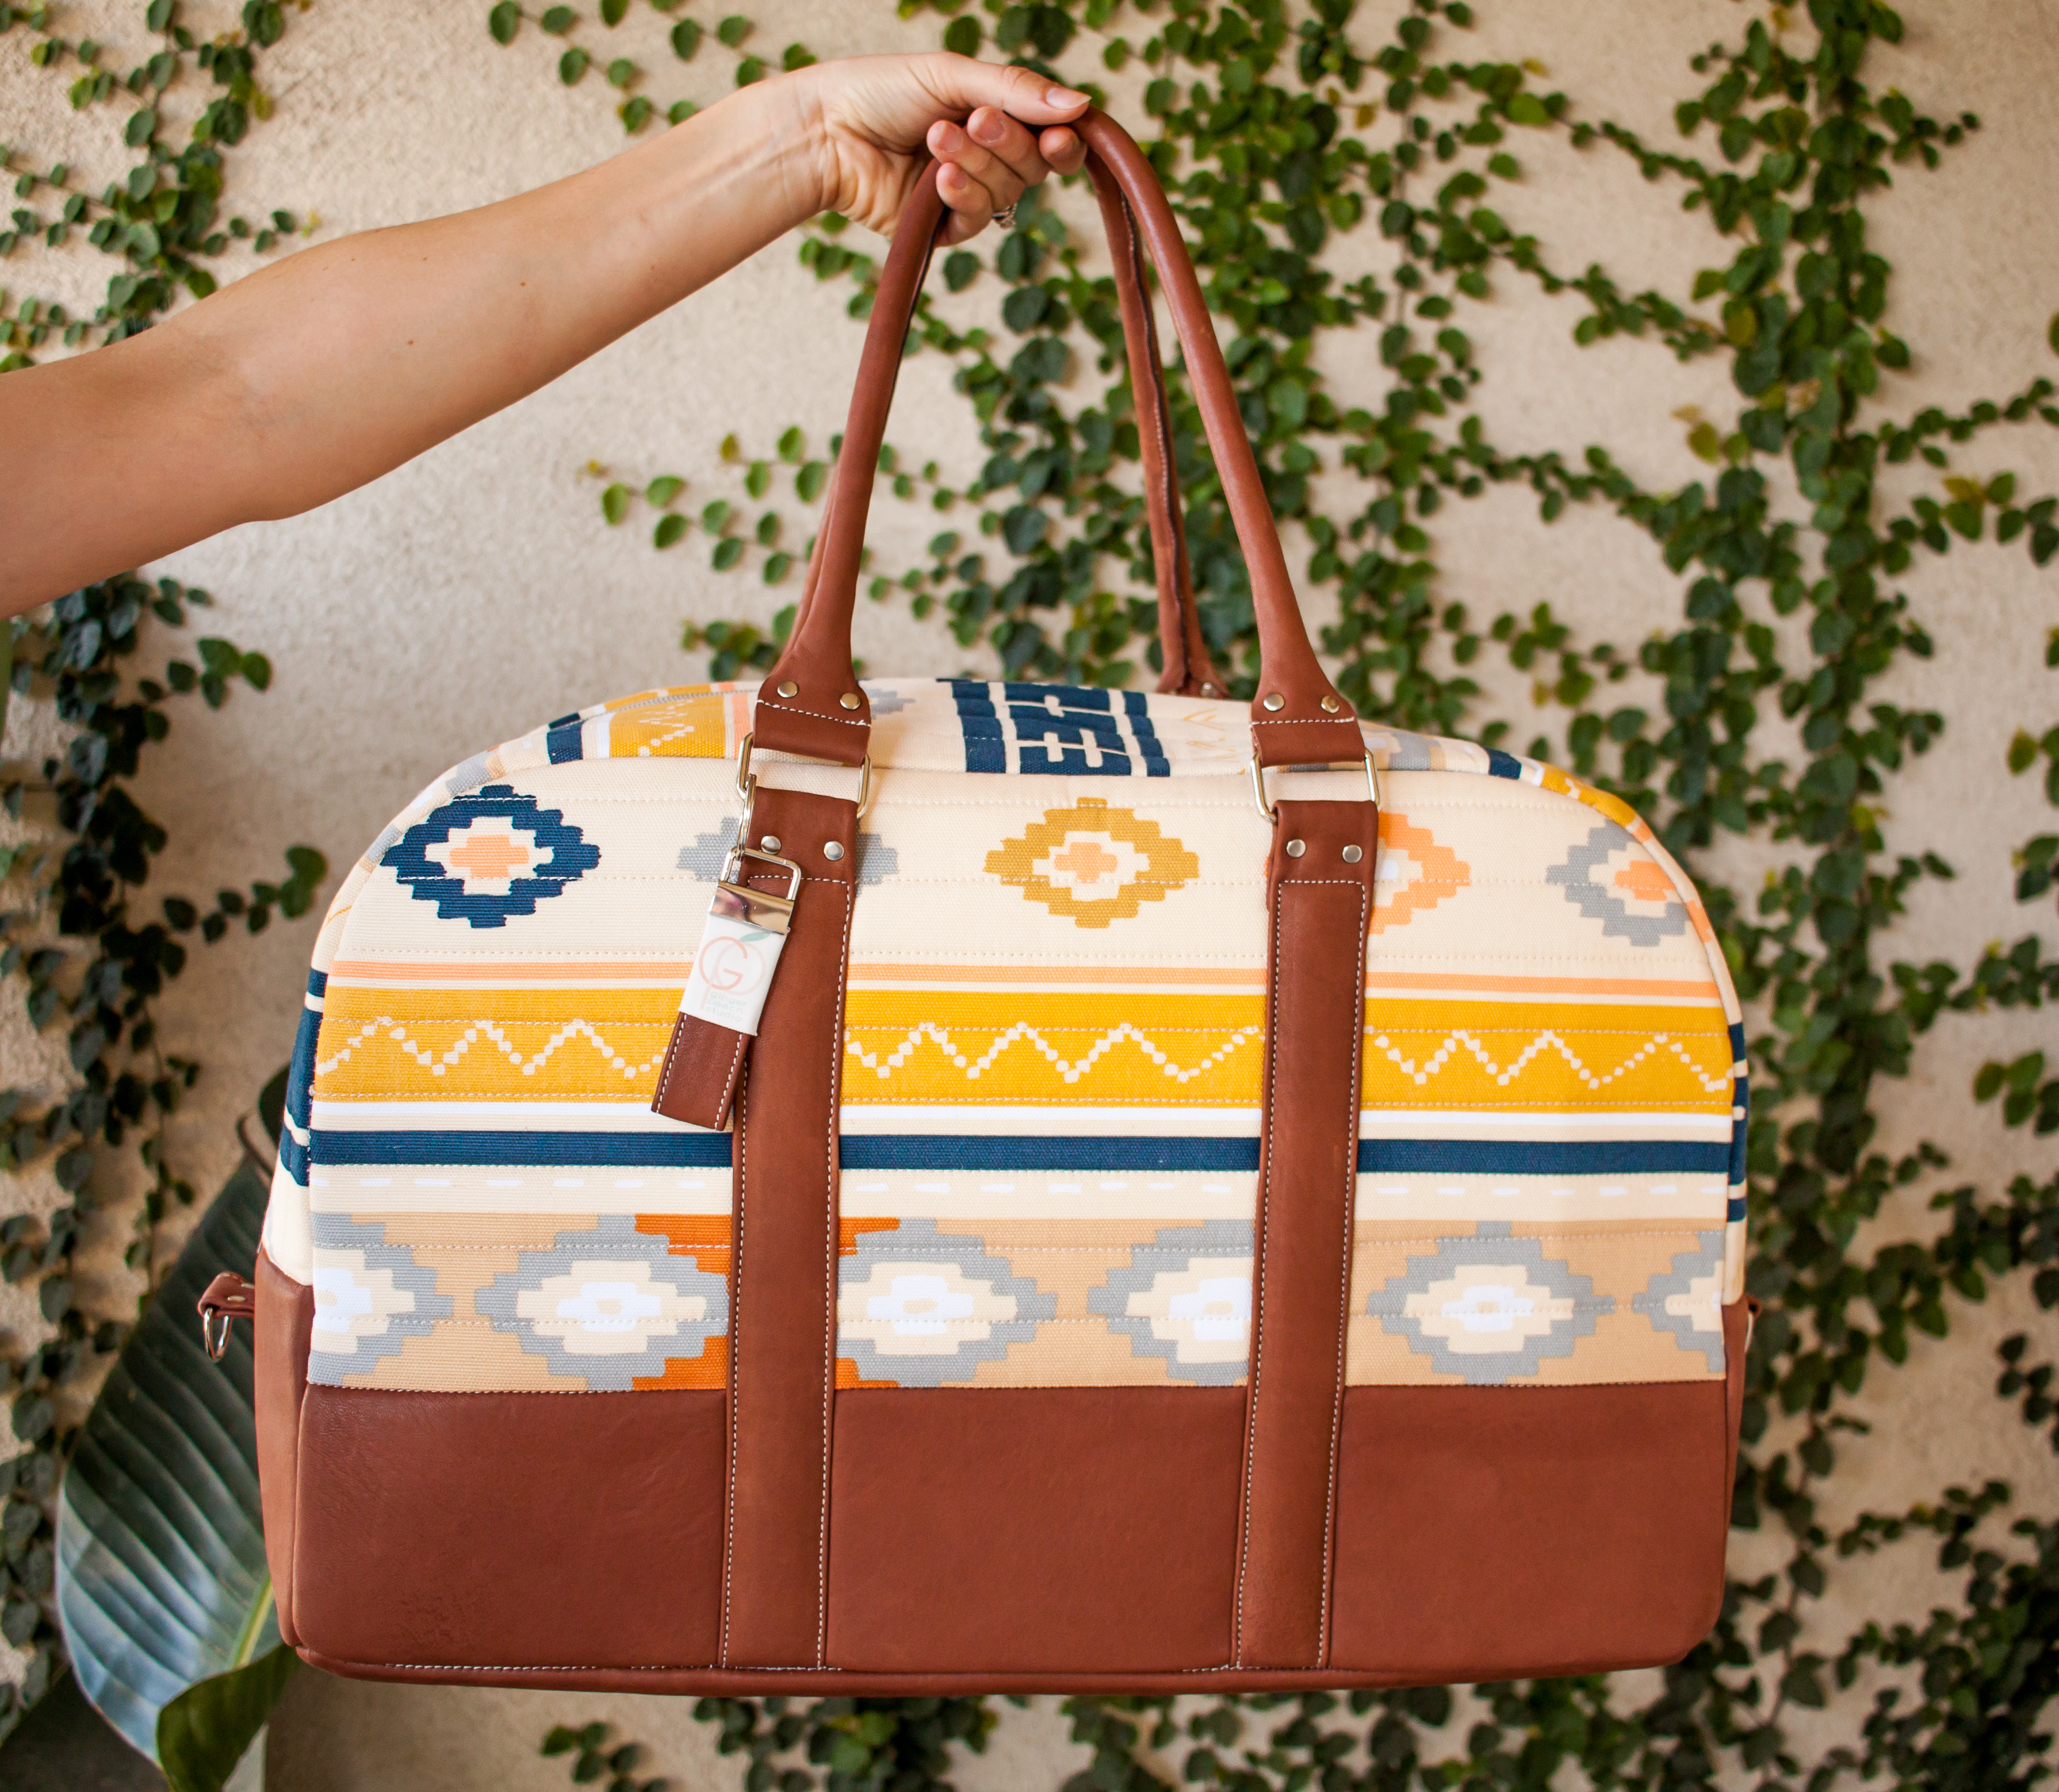
One thing that was a first for me was the addition of rivets. I bit the bullet and invested in the basic tools for inserting rivets, snaps, and eyelets into my leather projects. I love how they give the bag a professional finish. All leather working products were purchased from Tandy Leather. This was the first time I have ever ordered from them and I had the absolute best experience. The delivery man handed me my order less than 24 hours after placing it online. You can’t beat that kind of service. Not only that, they have an extensive video library on their website that demonstrates most their products. Fantastic company.
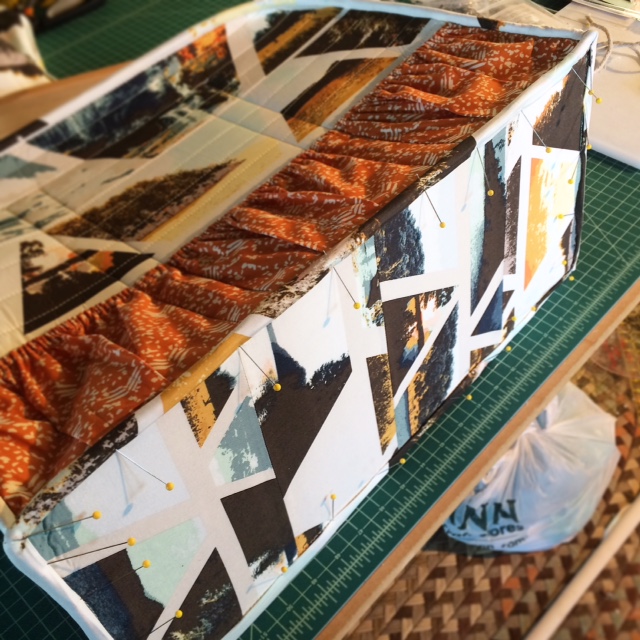
The rest of this post is a bit about my process, materials, and how this bag came to be. After deciding I wanted to give the contest a go, my next stop was my “bags” board on Pinterest to gather ideas for what I might want to make. Although I had a very strong contender on that Pinterest board I was having trouble finding a key piece of hardware I would need to make the bag in my mind. While in my studio pondering this dilemma and trying to find a work-around with the supplies I already had, I glanced up from my seat and saw this…
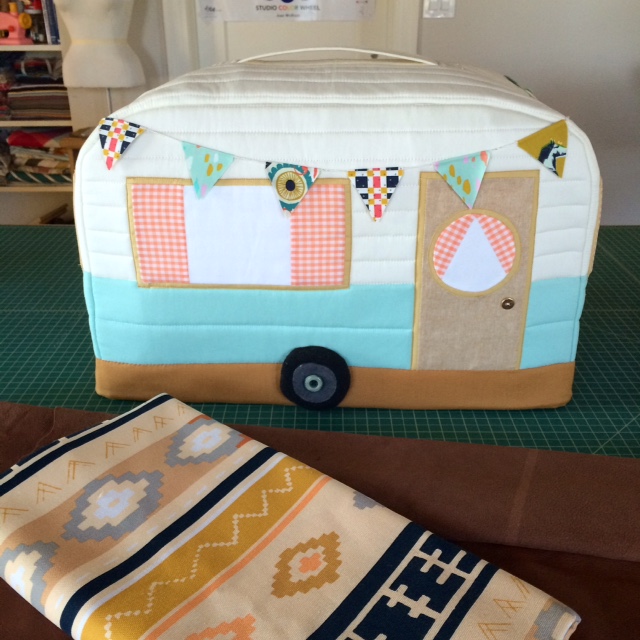
It was then that I realized the bag I was envisioning was exactly the same shape as My Retro Caravan sewing machine cover. I already had everything I needed to make the sewing machine cover. All I would need to do is locate some easy to find hardware, add a zipper, handles, bottom, and a few lovely details. I adjusted my plan and dove right in.
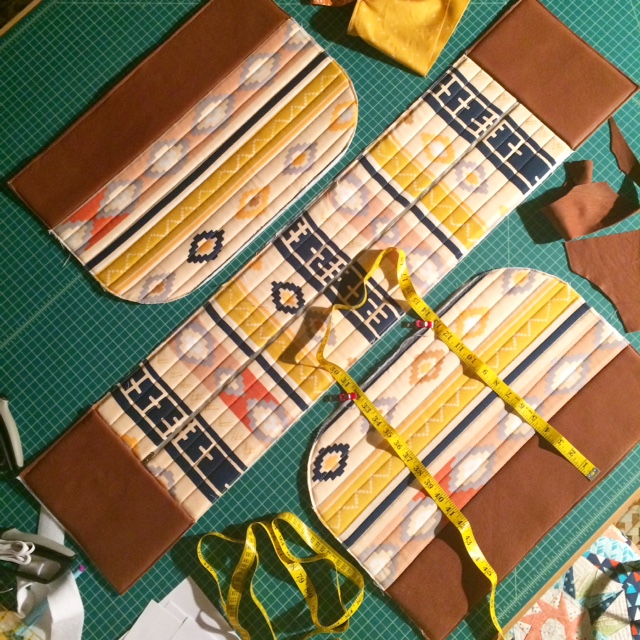
I used canvas from April Rhodes’s Bound collection for the upper-outer portion of the bag. The outer-lower portion of the bag is made from Italian lambskin purchased on Ebay that I have been hoarding for about a year. I constructed each section of the bag and quilted all the layers including the bag lining. I have developed a technique for doing this that makes the bag sturdy and hold its shape very well. That being said, I must admit that one of the secrets to my success in making sturdy, rigid bags is my Juki 8700 industrial straight-stitch machine. She can handle bulk like no other sewing machine I have used. You can read a bit more about that in my Caravan post. Just to give you an idea of what I was up against with this bag, there were some areas where I was sewing through 4 layers of lambskin, two layers of medium loft batting, two layers of Peltex 71F by Pellon (this is what gives the bag rigidity), plus 3 layers of fabric all at once. That kind of bulk is not for the faint of heart…or a machine without a fair amount of muscle. I have found that when sewing leather with a NON-walking foot machine, there are a few things you can do to help improve results.
Tips for Sewing Leather:
- Use Bonded Nylon Thread. I buy mine from ThreadArt.com. The thread is bonded together so the plys do not unravel. Also the coating helps reduce friction with eye of the needle.
- Use a large needle (16-18) with a LARGE EYE. This is very important. If you use a small eye with the heavier thread you will have shredding problems.
- Use a supple leather (like lambskin) and stabilize it on the WRONG side with a woven fusible such as Shape-Flex by Pellon. Doing this allows you to use a thin, soft leather that is easier to penetrate with out it losing its shape or stretching too much. This is essential for making straps. I had no issue fusing the stabilizer to the wrong side of the leather with a high heat setting, but always do a test-run with scraps to be safe.
- Take some time before you start and Dial in your tension settings. Always, always, always, but especially when you are using a material such as leather. which your machine may not be designed to sew on a regular basis.
- Use a teflon presser foot to help the feed dogs out a bit and reduce drag.
- Increase your stitch length to 3 or higher for top stitching depending on your desired look.
- I have found an Electrician’s Pick up tool to be very helpful for turning tubes to make straps. Especially Leather tubes. Much easier than a safety pin.
- Before you start a section of topstitching check that you have enough bobbin thread to finish the entire bit of topstitching you are working on. You don’t want starts and stops to fall on key design elements (in this case, straps going down the front and back of the bag). This is particularly true if you are using contrasting thread on the leather as I did with this project.
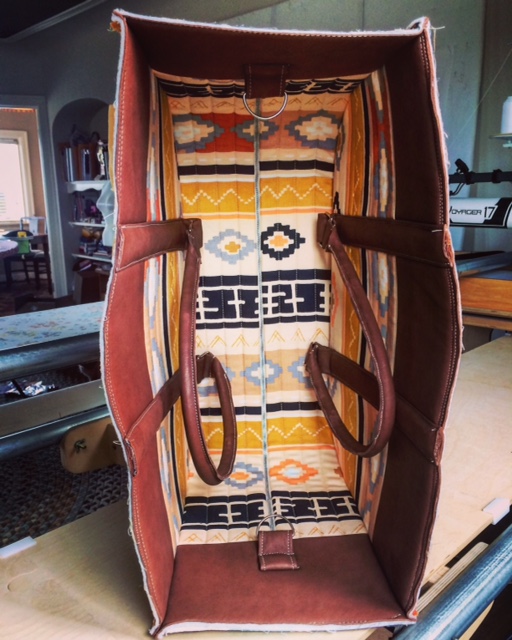
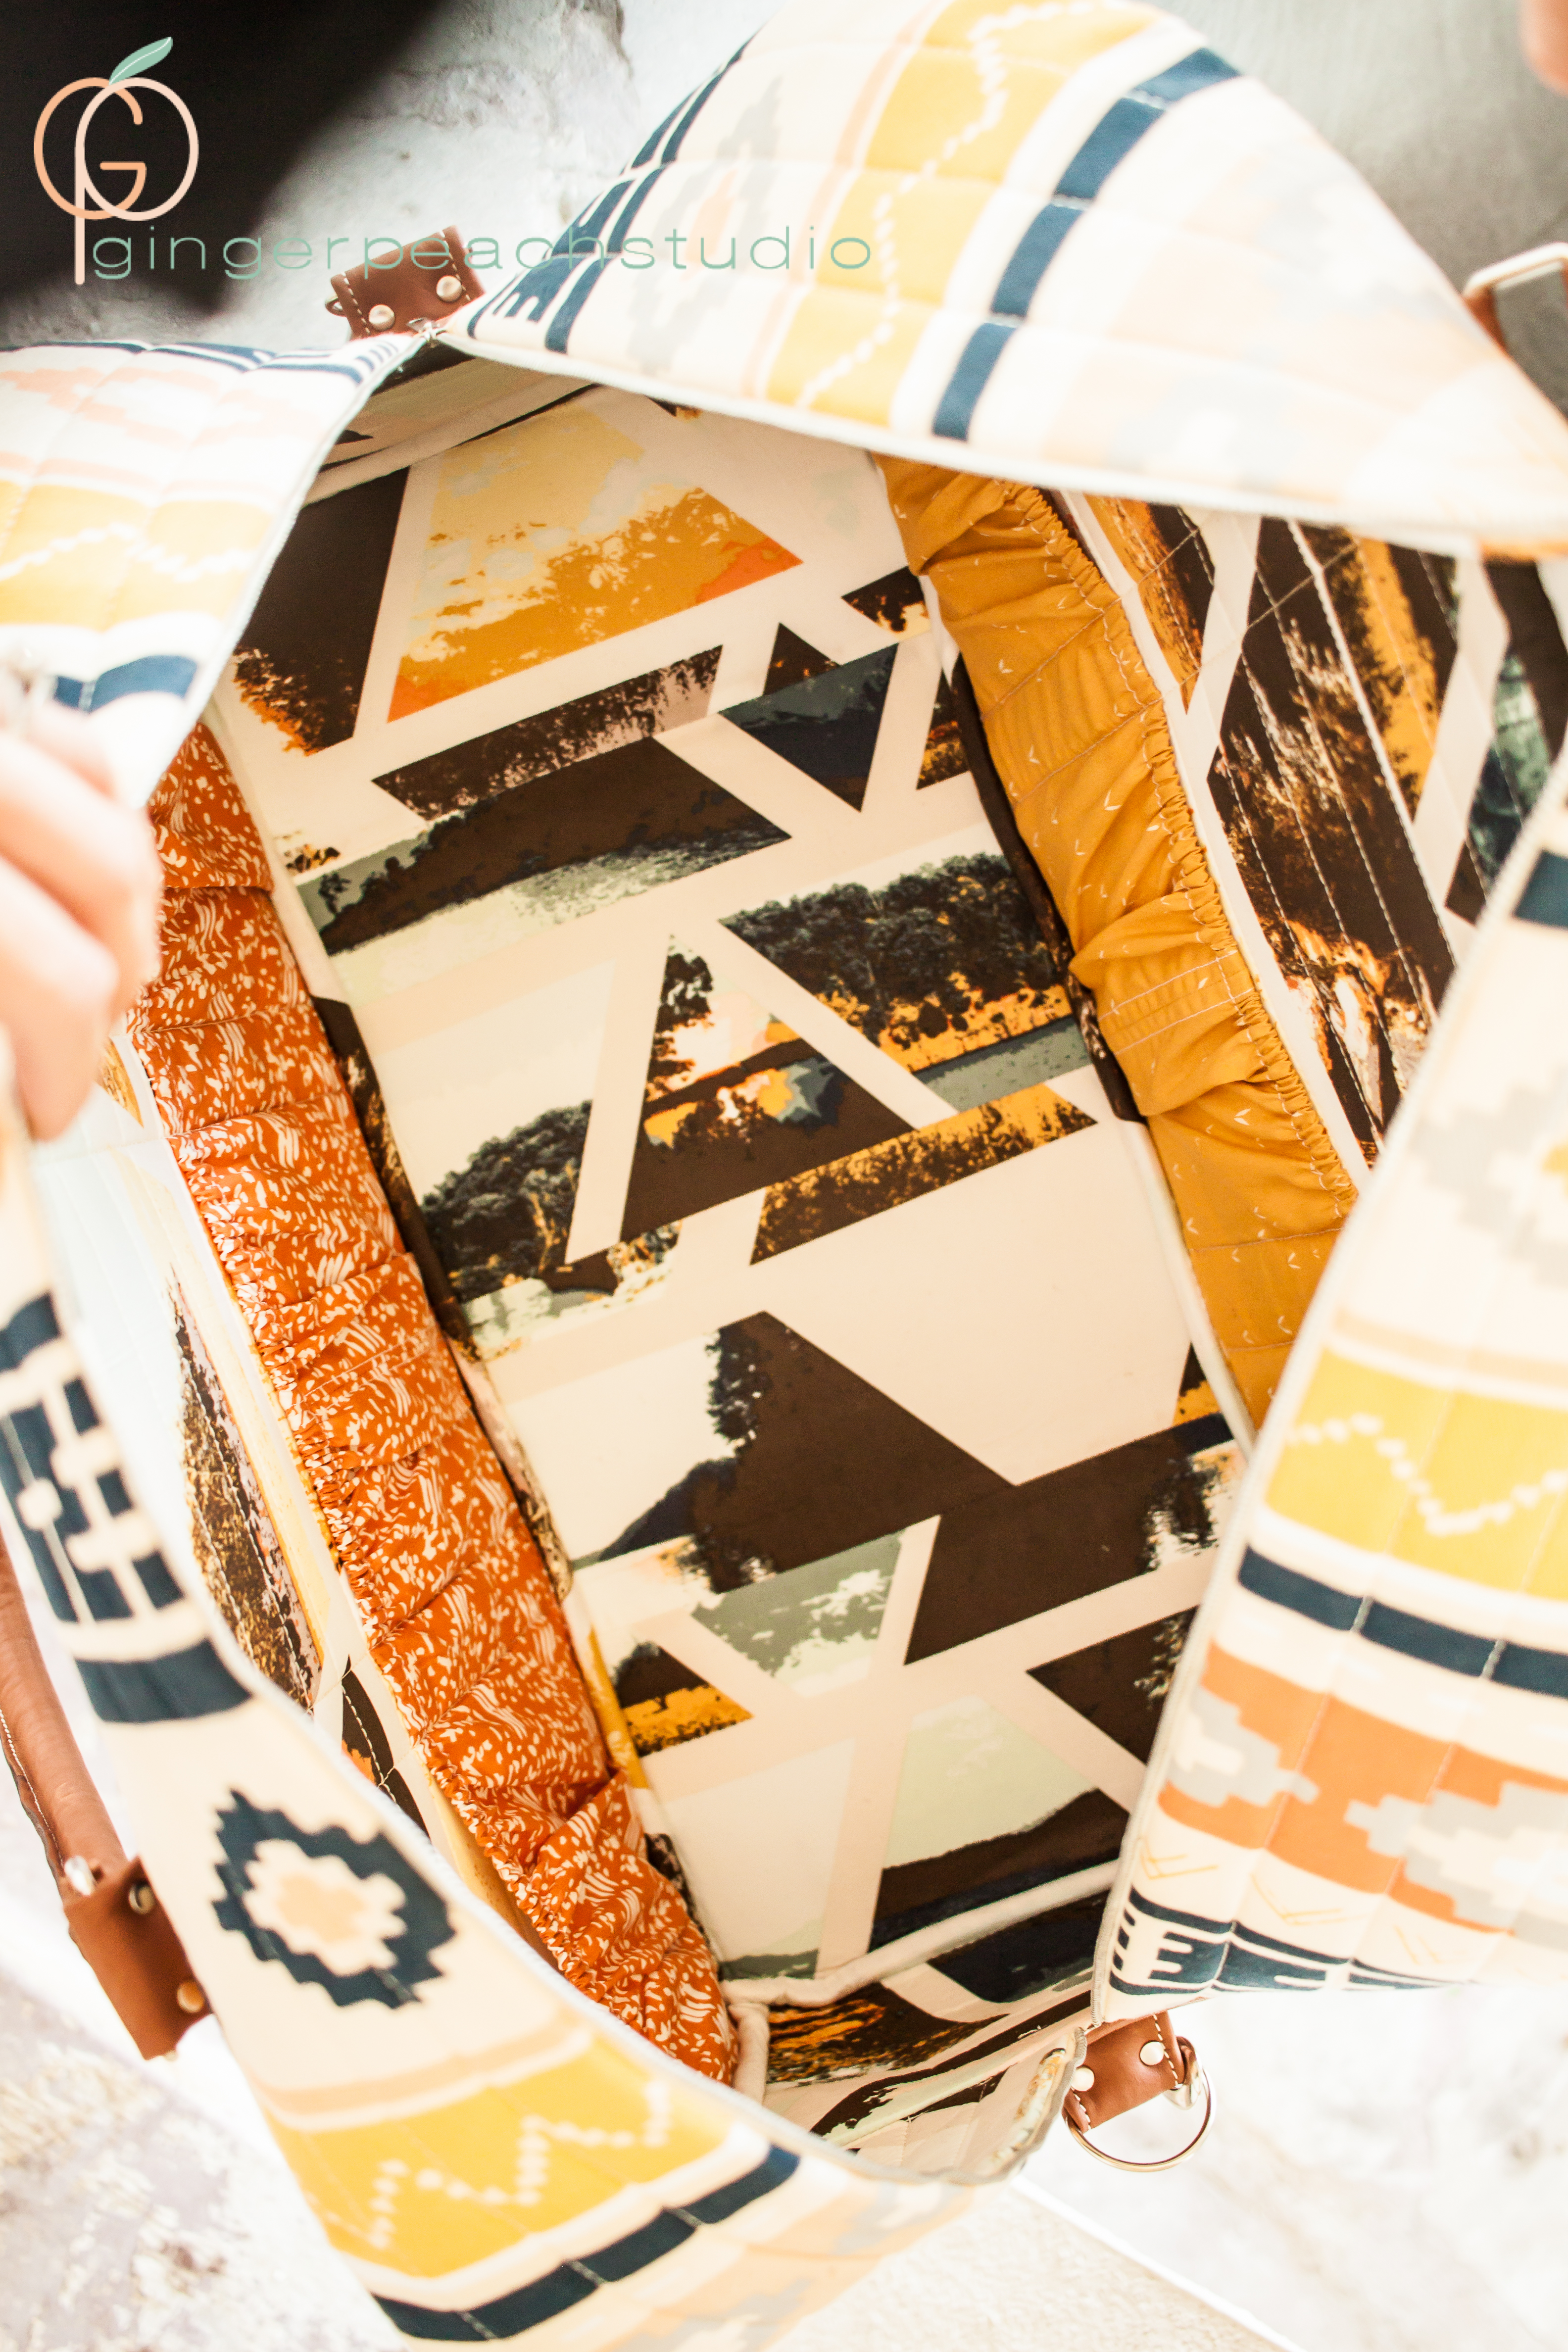
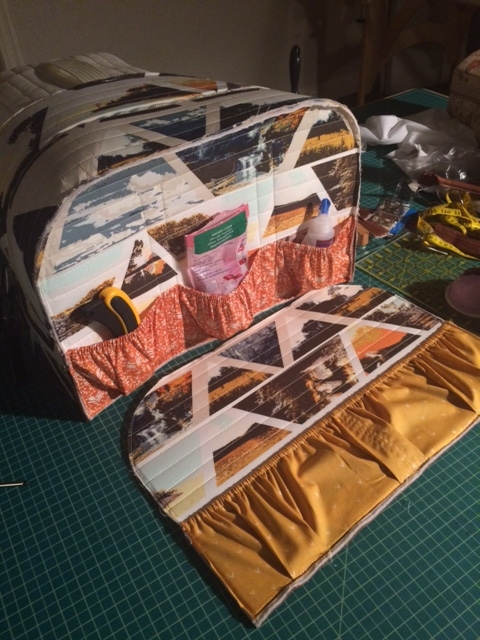
For the inside of the bag I chose to use 3 prints from April’s previous line, “Wanderer” for a couple reasons. One, eventhough I had to piece some of the lining bits together, I already had all of this in my stash. Perhaps the more important reason though, was that this is a weekender bag and the Wanderer collection (especially the main lining print) could not be more perfectly themed for a bag such as this. It was meant to be. As you can see in the photo above, the bag is quilted through the lining, giving it a super smooth finish. I also added interior pockets with encased elastic to keep all my necessities organized and in their place while traveling. I made the bottom of the bag rigid by encasing a rectangular piece of corrugated plastic from Home Depot in bags bottom. I also Added Purse feet to help keep the leather from scuffing on the bottom of the bag. I finished the bag with bound seams to give it a nice clean finish with no raw edges.
I am just in love with this bag. It is the perfect grab and go carry-on for a quick weekend away. The style is perfect for me as is the size. I know that this bag an I will have many wonderful years together. If you have any questions about my process or sewing with leather and bulk. Please comment or email me and I will do my best to help you out. Also don’t forget to cast your vote for the #BoundChallenge on Art Gallery’s Pinterest page. There are so many lovely and talented makers displaying their work there. Go choose your favorite!
Love your bag and tips on sewing with leather! I was wondering if this is your own pattern and if so, is it for sale anywhere? I love weekender type bags and would love to add this to my pattern collection!
Hi Jennifer. Yes this is my pattern but this was a tester of sorts and it is not yet for sale. I would love to make this pattern available to the public but before that happens I need to do some testing with other materials. I made this with an industrial machine. It has a lot of power and can handle a lot of bulk. If I am going to write a pattern I want to make sure that the home sewist will have the best possible results with their home machine. I want people to have a happy pleasurable experience with my pattern. I don’t want people to be frustrated and fighting with their machine the whole time. The pattern will come it will just take me a bit of time to figure all that out. Follow me on Instagram for the most up to date info on this as that’s where I am the most easily reached. 😉
I love this bag. You really did a great job of designing, selecting fabrics, sewing & writing! Great job. I would love to know how to make a nice bag using leather.
Thank you so much Annette! I chose the fabric based on the Bound Challenge prompt so I can’t really take too much credit for that, lol. The leather I got on Ebay and it was pretty easy to sew with when you have the right tools and settings on your machine. If you want to start sewing with leather I recommend something soft like lambskin. It is a very supple leather that I think most home machines would be able to handle without issue. Start with a small project like a zipper pouch or something like that to get a feel for the material and how it behaves. That way if things go wrong you won’t have invested too much in time and materials. You can use the small project to see how your machine handles the leather and figure out what settings will give you the best results. Once you have those basics down you’ll be off and running.
wow!!! That is one top-notch bag!! It’s SO professionally done, and the quality is just outstanding!! Gave me lots of things to investigate, like your machine, Tandy Leather, etc. When I was on a trip to NYC a few years ago, I visited Mood Fabrics and they had some lamb skin leathers that were absolutely dreamy! One was a berry-colored lamb suede that was sooo soft! I wanted to buy it but I have zero experience with sewing on leather. I have trouble sewing anything the least bit heavy like two denim layers; I have a Bernina, so maybe that is why? Idk.
Anyway, congrats on a gorgeous bag!!
Thank you Karen! I must admit I love my machine. She’s a no frills kinda girl, but I do thing I’m a better sewist because of her. Having a machine that is all mechanical has forced me to learn things I never would have if I relied on a traditional domestic machine to do them for me…like tension. I used to stress about tension but I never do now wether it’s leather or chiffon. I have complete control over that aspect of my sewing and it opens up a lot of possibilities for me. I do have a domestic home machine but I mostly use it for specialty stuff like zig-zag, and buttonholes. I have always wanted to go to Mood. They have the most beautiful stuff. I will say that I think you should give the lambskin a go on your Bernina. It’s very soft and I bet your machine can handle it. Try a small project like a zippered pouch. Use a stabilizer on the wrong side to deal with any stretch that might occur. Your machine might surprise you. Denim is difficult for many machines because it has a tight heavy duty weave with difficult to penetrate threads. That’s why the fabric is so durable. If you do give it a try tag me in your project. I’d love to see how it goes. If you have any other questions about leather sewing or my machine send me an email and I’d be happy to answer your questions. Much luck to you!
This bag is amazing! I am wanting to make some bags for my kids for a trip coming up and this seems like the perfect size. Is the pattern ready to go yet or would you be able to answer a couple questions?
Hi Katie. Thank you for your interest in the bag! Unfortunately there is not a pattern available for this bag yet. I adapted this bag from the Retro Caravan sewing machine cover pattern. I do plan to release this as a pattern in the future although as of yet there is not a release date set. I would be happy to answer any questions you have. email me at jennifer@gingerpeachstudio.com
Hello!! I came across this site in hopes of looking for Weekender bags and this one you made it AMAZING!!!!!! I was wondering if you have decided to post any bags to sale yet, if so I am interested!
Hi Courtney. Thank you so much for your interest. Unfortunately, it is unlikely that I will ever sell these bags as a finished product. What is very likely, however, is this bag becoming a PDF pattern for download. That is one of my goals this year.
Thanks so much for all the great details and tips on tools and techniques. Your bag is beautiful and has a great professional finish.
Thanks Ramona! I hope to pattern this bag in the near future so stay tuned for that. 🙂 Along with the pattern will be more tips, more supply sources and all my best knowledge for working with leather.
I love this bag! I also read your post on your sewing machine cover and mentioned using heavy gauge wire in the binding. Did you do that for this one as well? Also I would love to subscribe to your blog too.
Lori I did not use wire in this bag. I used a piece of corrugated plastic from the hardware store between the layers of the bottom piece to give it rigidity. It made it more difficult to turn out but without it the bottom would have been saggy and unattractive in this design. The wire you referred to I also purchased at the hardware store and cut it down to size. I recommend cutting it at least an inch or two shorter than the length of the side to reduce the chance that it will poke through your fabric over time.