
For years I have been telling myself that I want to beautify my sewing space. I always see these gorgeous studios on social media and think, “Gah, I would love to have a pretty space to sit in while I work.” The truth is while functionally my sewing space is fabulous, I really haven’t done all that much to decorate it. Don’t get me wrong, I LOVE, repeat, LOVE my studio. I have a large space with all my things within arms reach and I am extremely grateful for that. It really does make all the difference.
Despite its functionality, my space does lack decor in my opinion. I have done a couple of things to make my space prettier but not very much. I recovered my sewing chair and ironing board, displayed my collection of tiny sewing machines, and organized the bookshelf. But this. This sewing machine cover just might send me into studio beautification mode overdrive. I think this is the kickstarter I needed to initiate “Project Studio”.
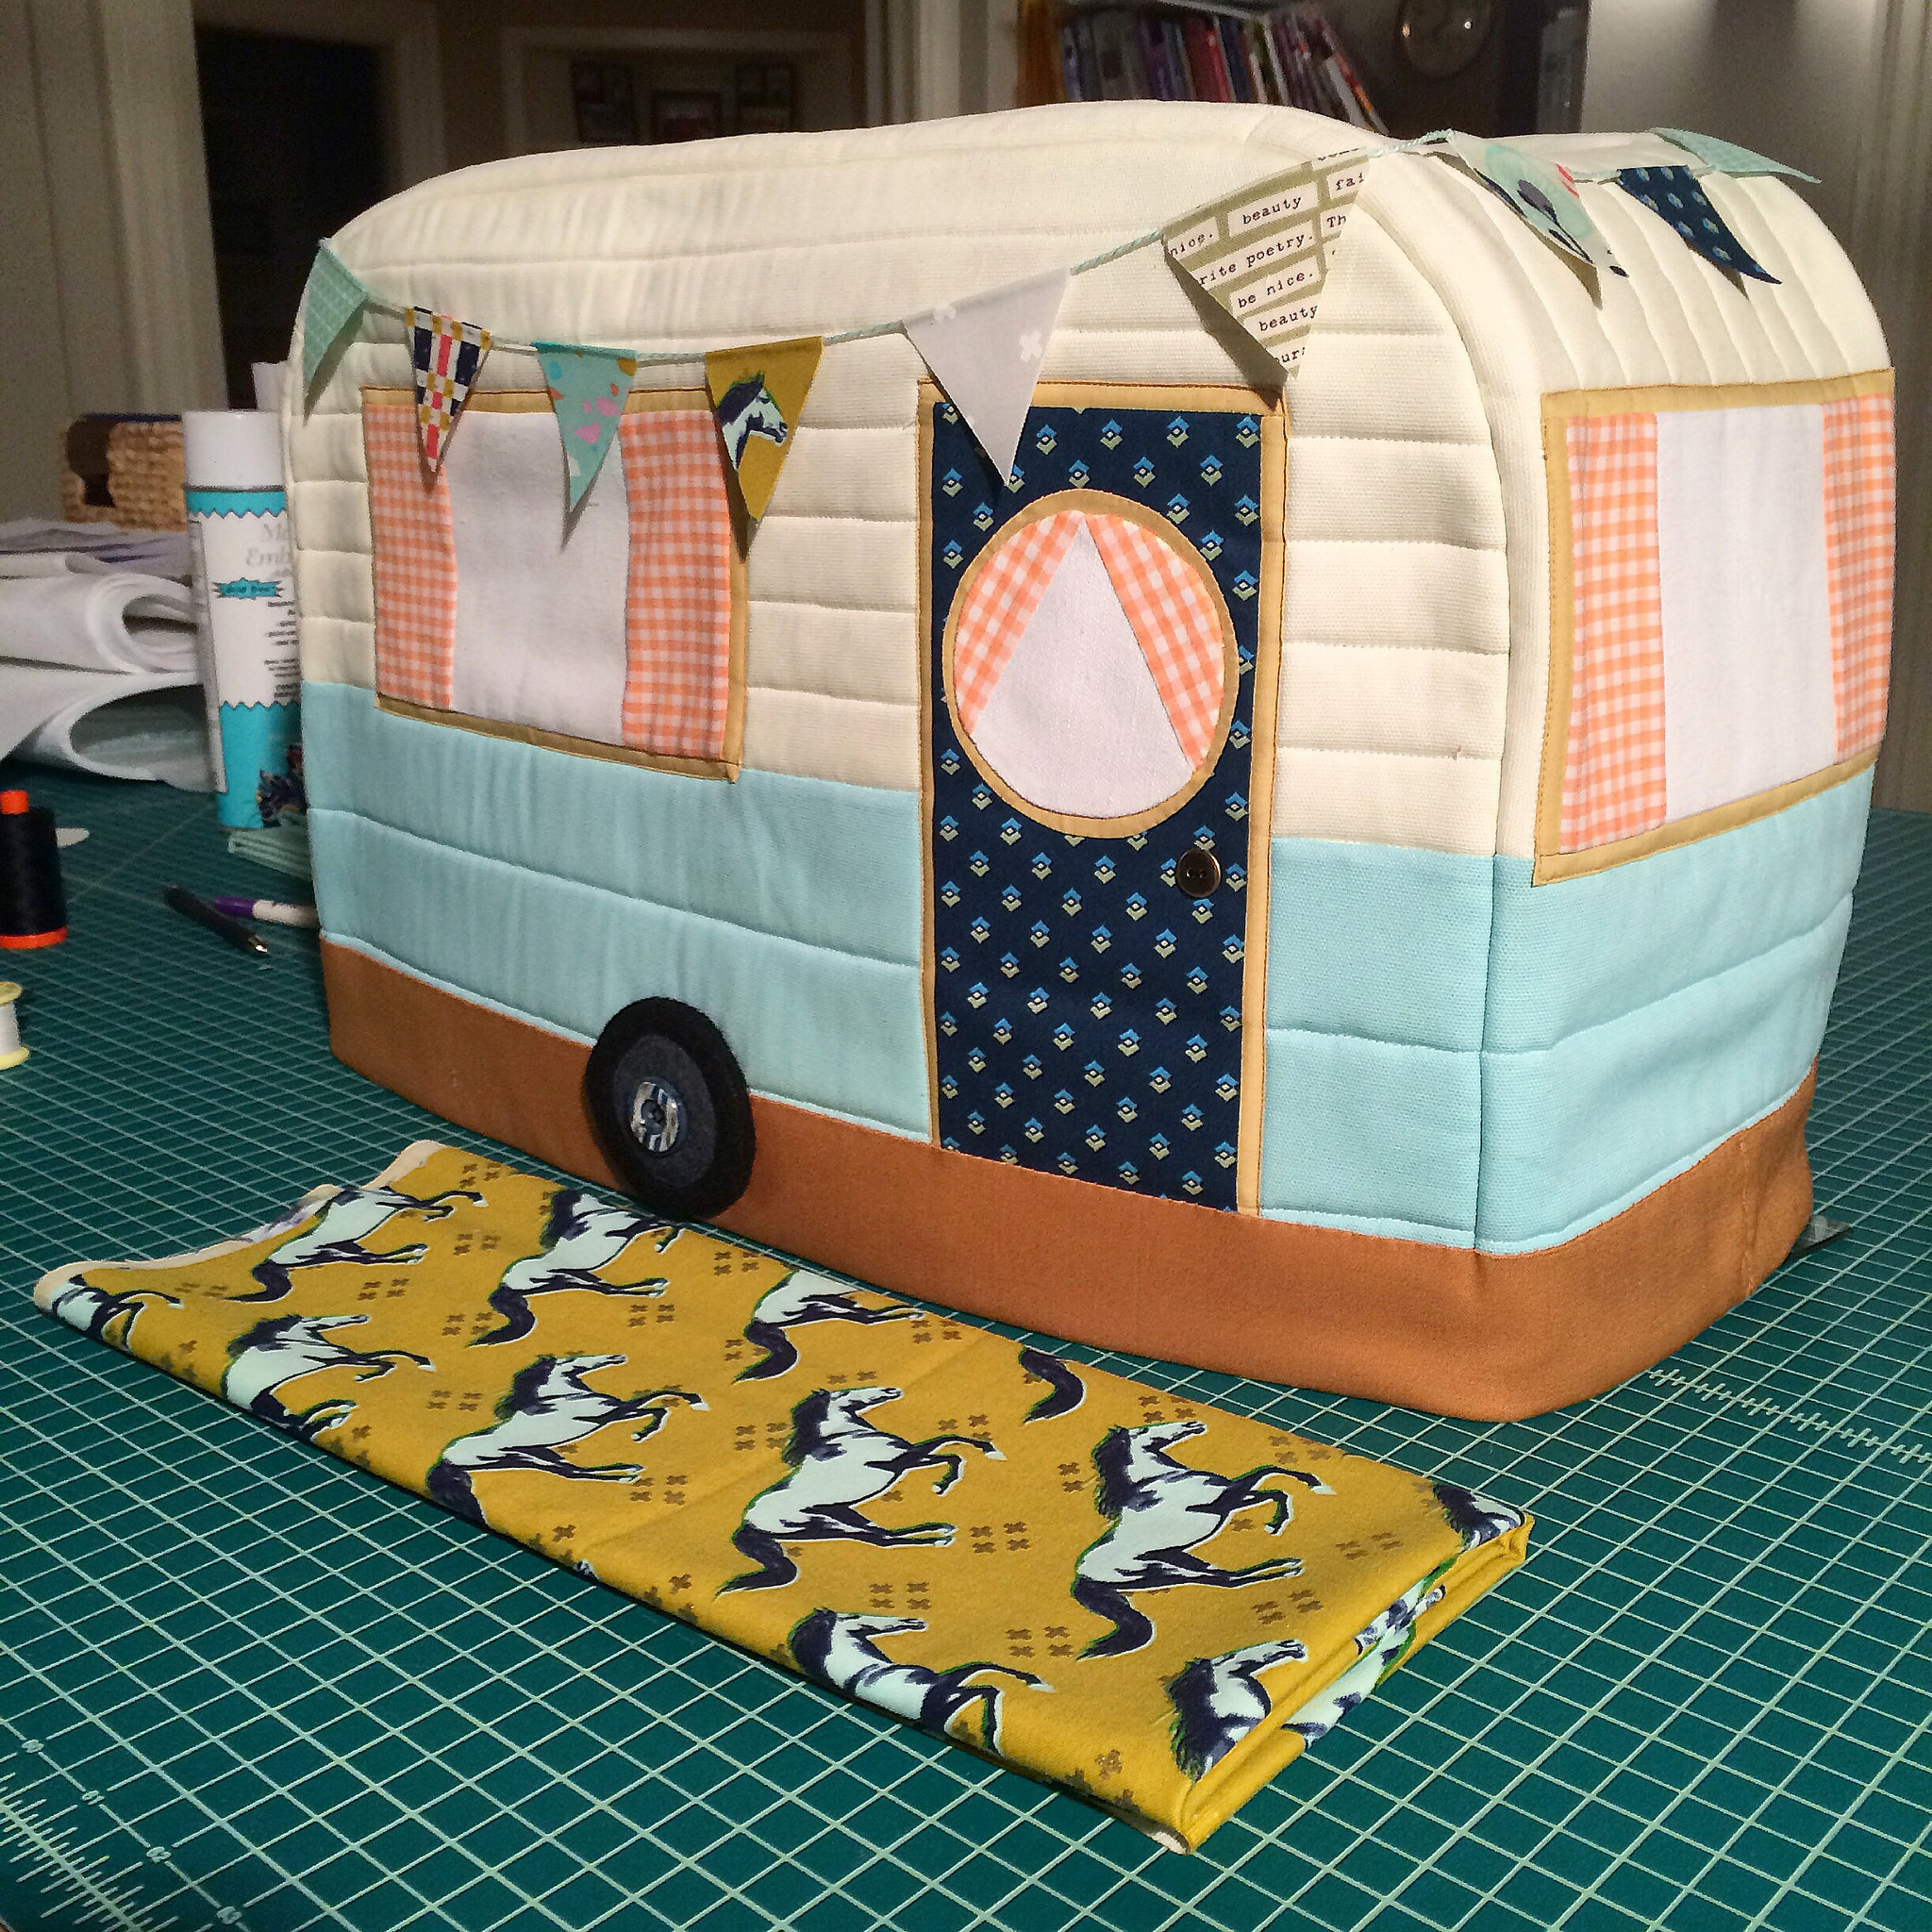
I knew as soon as I saw this pattern that I had to make it. I was perusing Craftsy for a pouch pattern to give to my Schnitzel & Boo swap partner when I stumbled across it. I knew it was a big add-on but once I get ideas like this in my head it becomes like an itch that must be scratched. I HAD to make her one. She would never expect it. I love surprises like that. When you give someone something and they’re blown away because it was just so much more than they were expecting. THE. BEST. So I went for it and this was the result. The Mustang Print was used for the lining.
Note: This pattern has since been removed from Craftsy but can still be found on here on Etsy
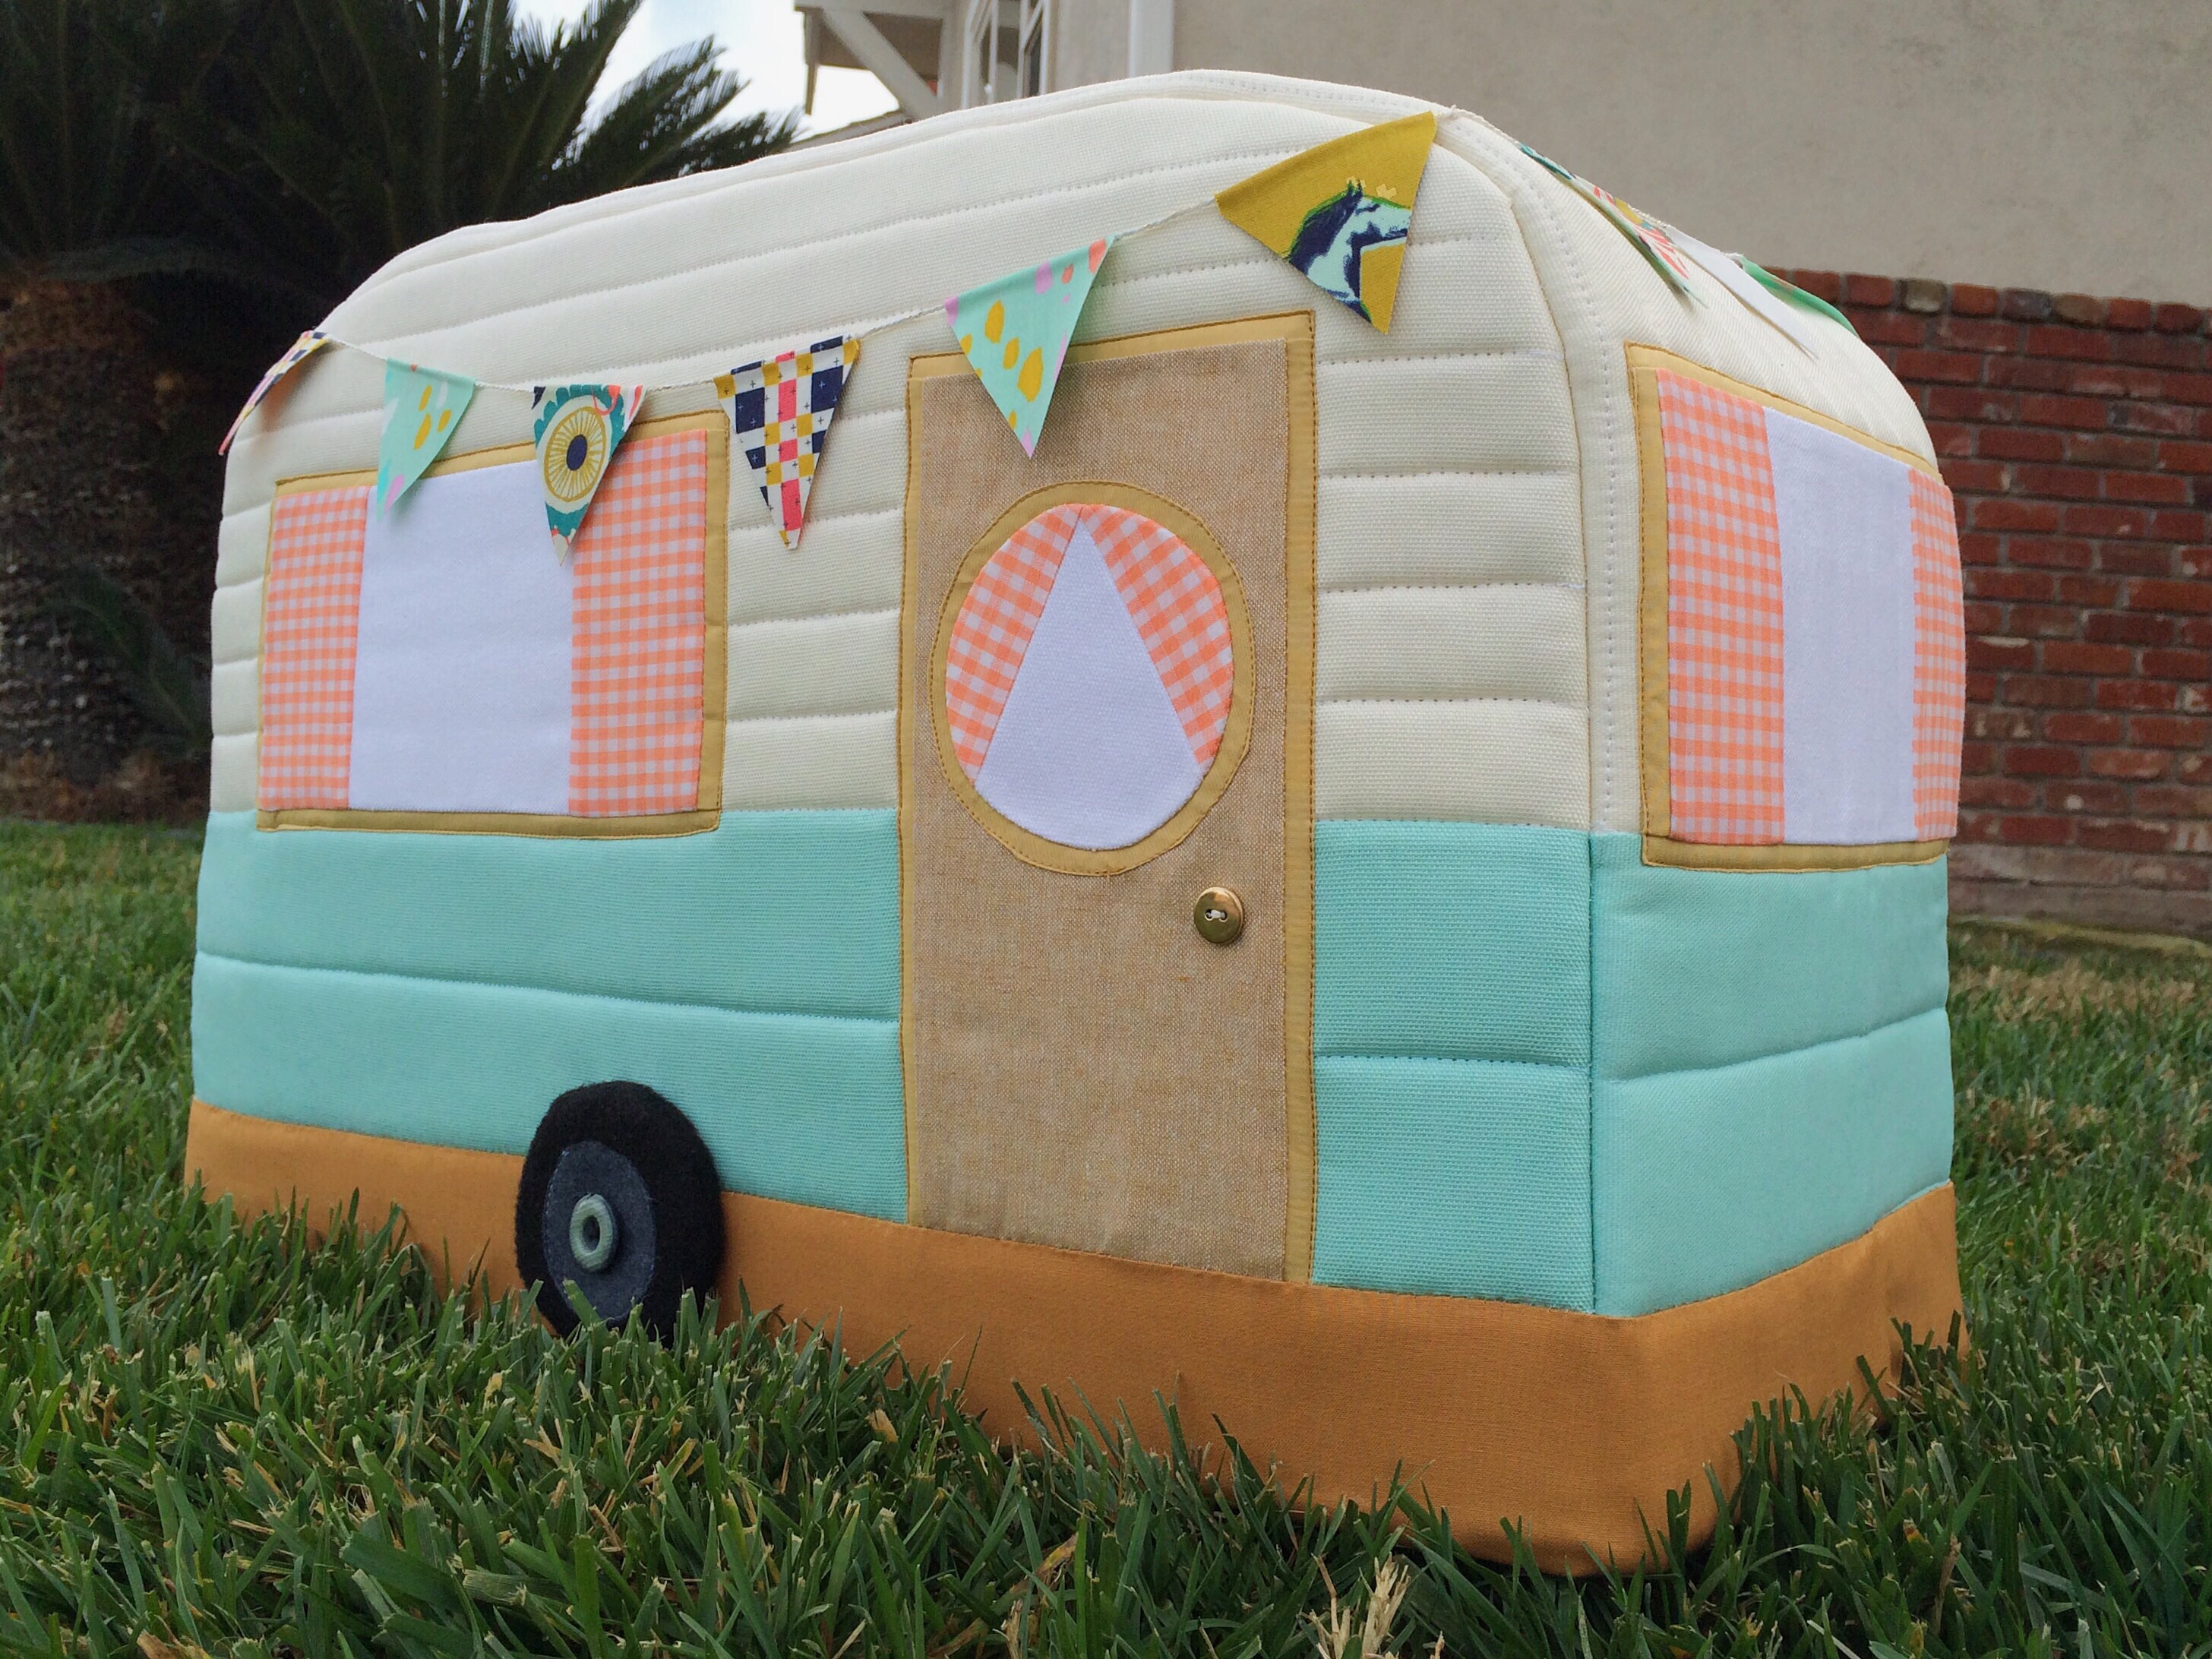
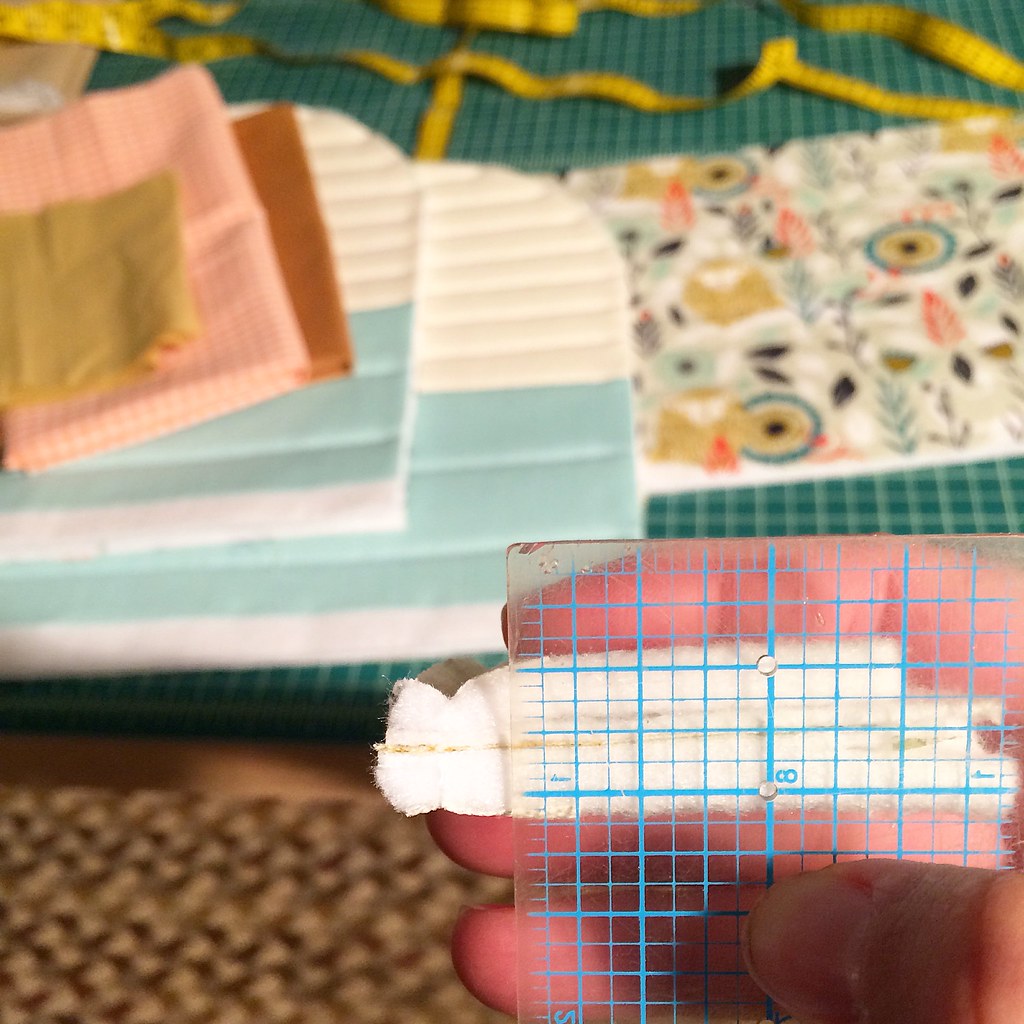
I knew immediately that I had to make another. I decided to make a few changes to the pattern that I thought would improve the structure of it a bit and make it more rigid. The pattern called for three layers of batting to give it body but I still felt like it still needed more. I used the most rigid Pellon product I could find at Joann’s (Peltex 71F) in addition to the thickest, heaviest stabilizer I could find. I sew on a Juki 8700 industrial sewing machine and I was confident that it could handle the bulk. This is what I was up against.
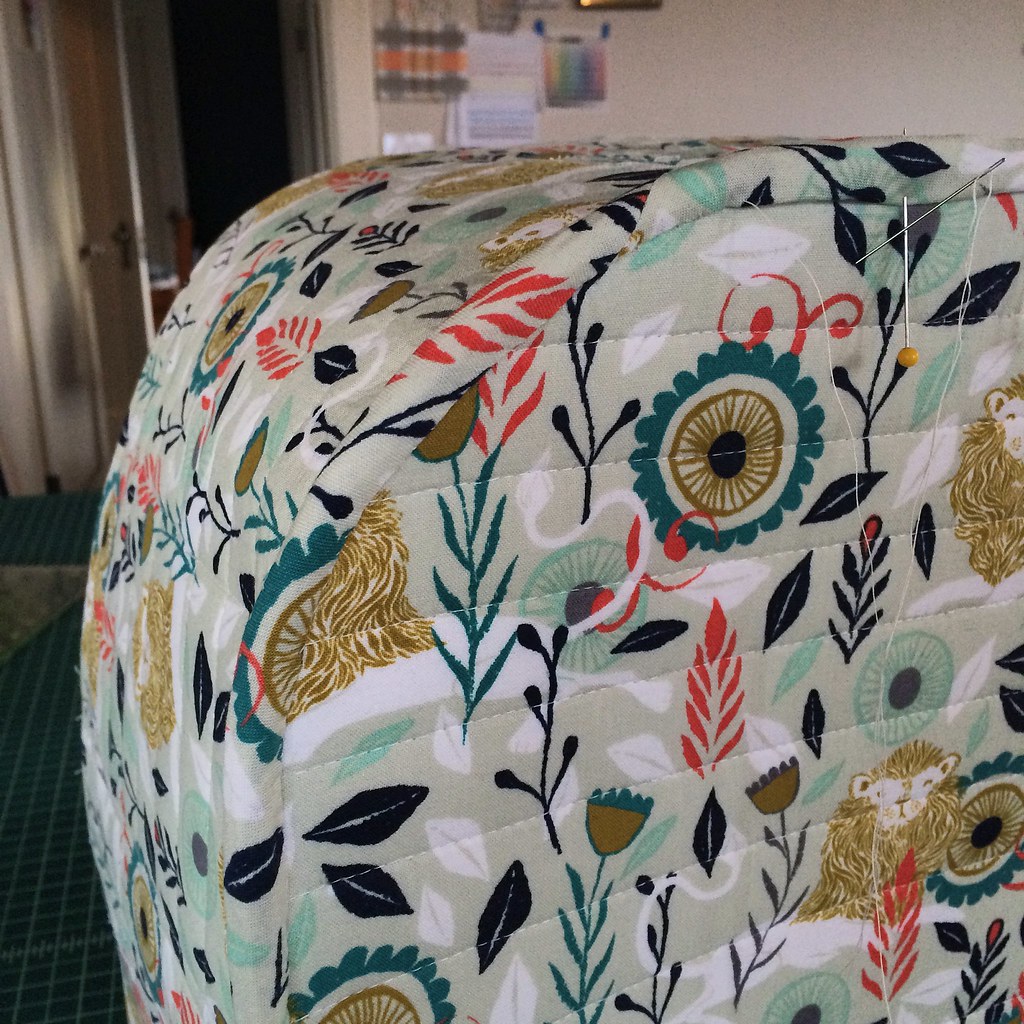
The second time around I chose to alter the way the pattern instructed to do the lining and I went with a quilted version instead. I thought this would save me time but the bias-bound inside seams ate up whatever time I thought I would save. Despite the fact that it didn’t save time I much preferred the look of the lining in the second version so I was ok with not saving the time. It gave it a much more professional-looking finish. I also added a handle to the top.

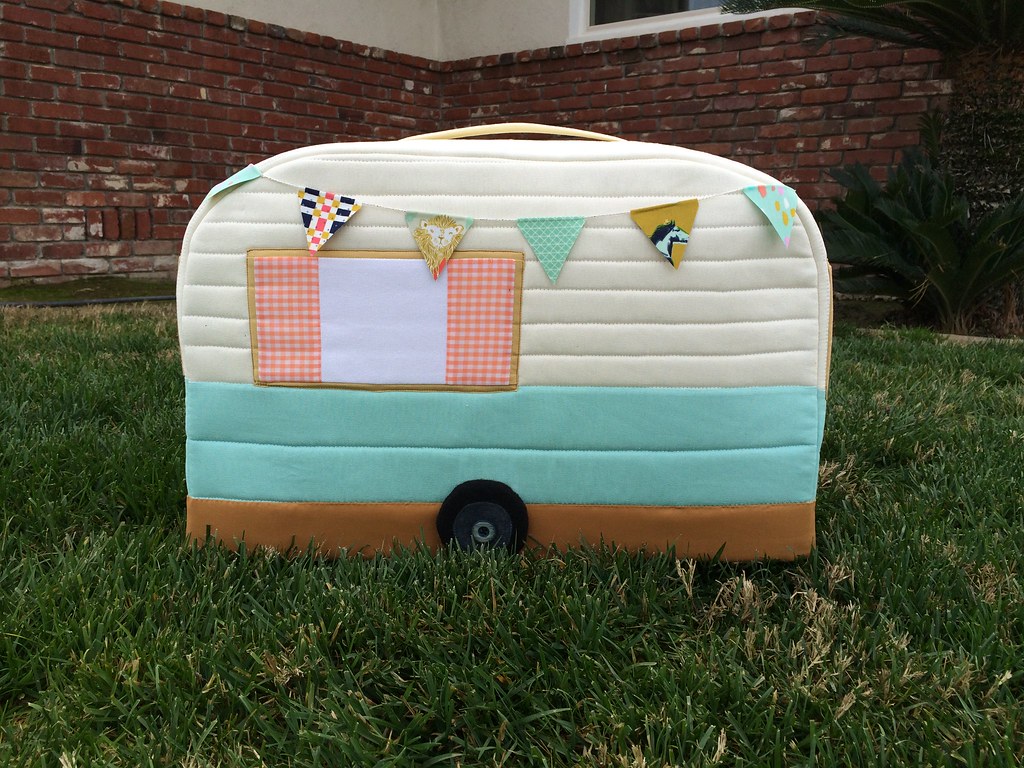
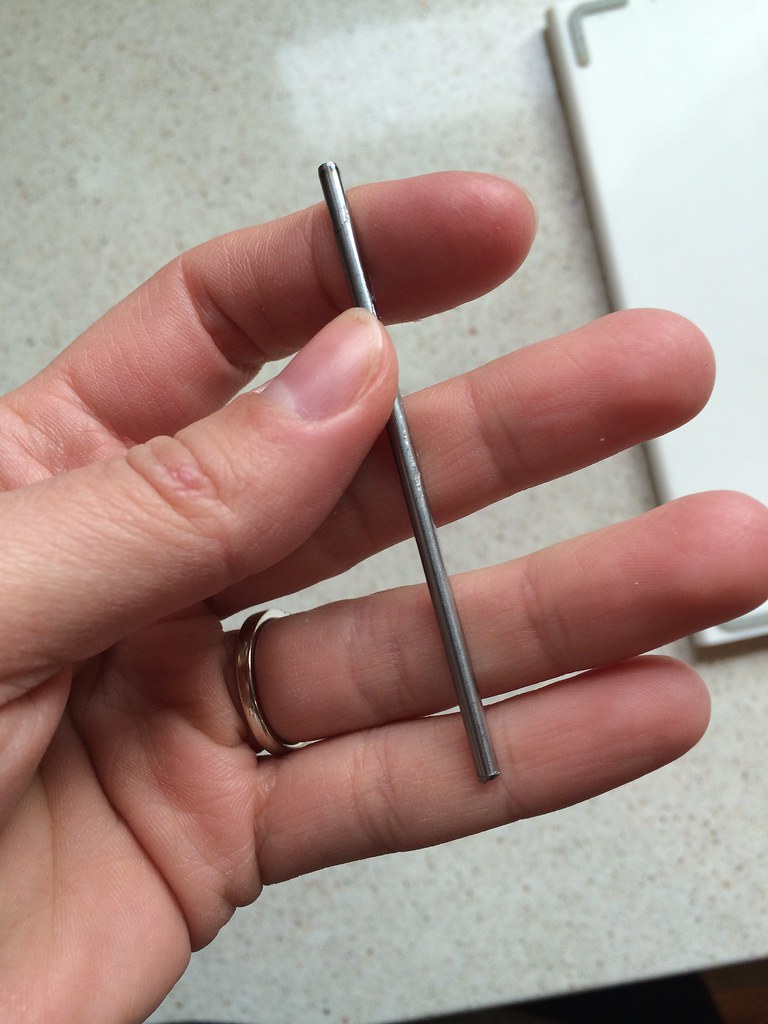
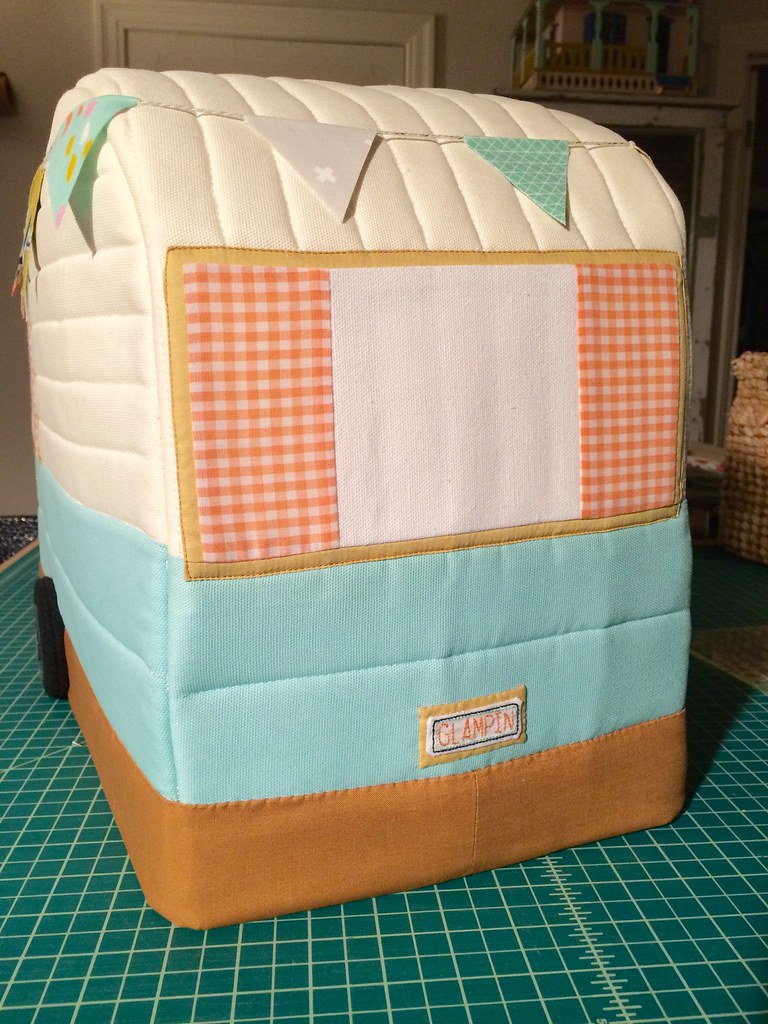
Another structural change I made to help with rigidity was to insert heavy gauge steel wires into the binding along the bottom edge and it made a huge difference. You can see the difference below where two of the four sides had the wires in place.

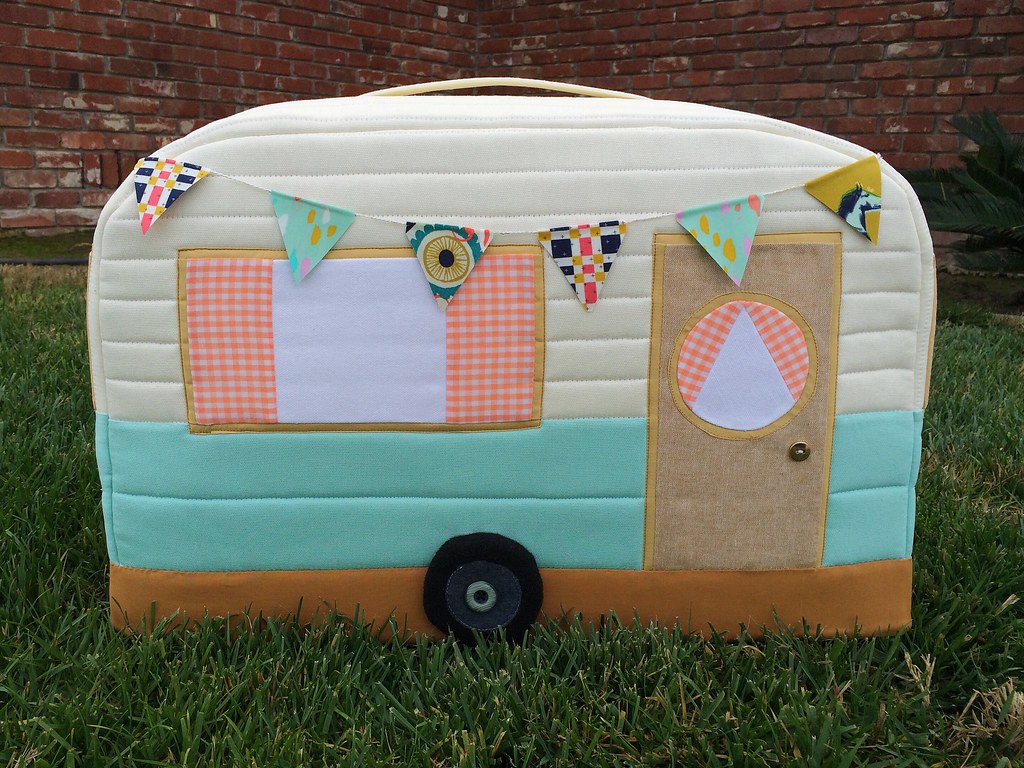
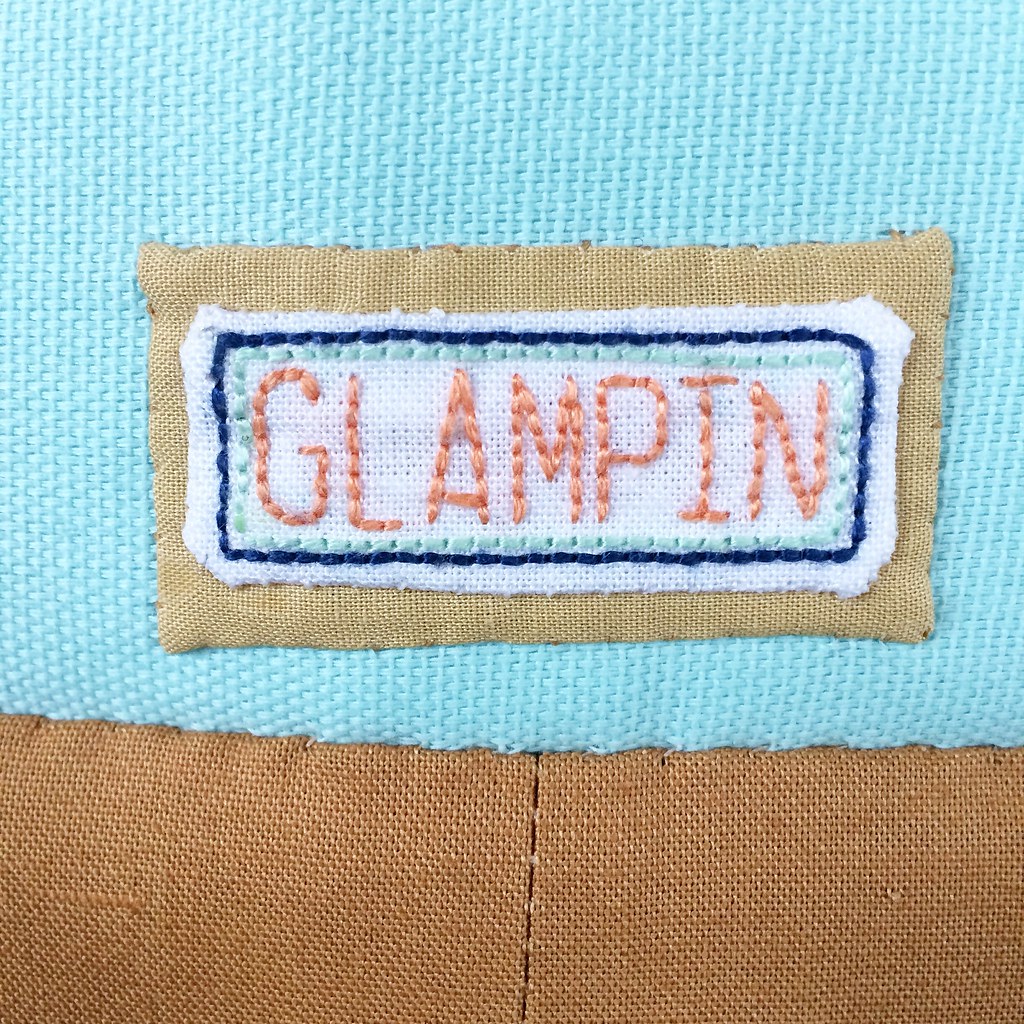
I saved my favorite detail for last…
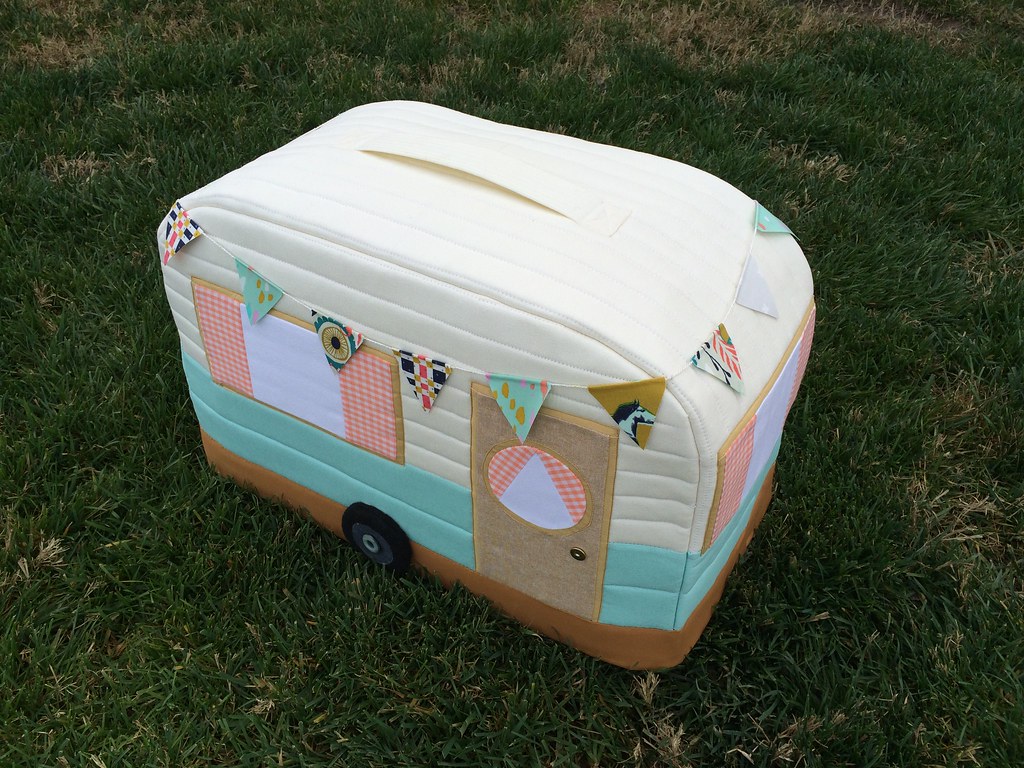
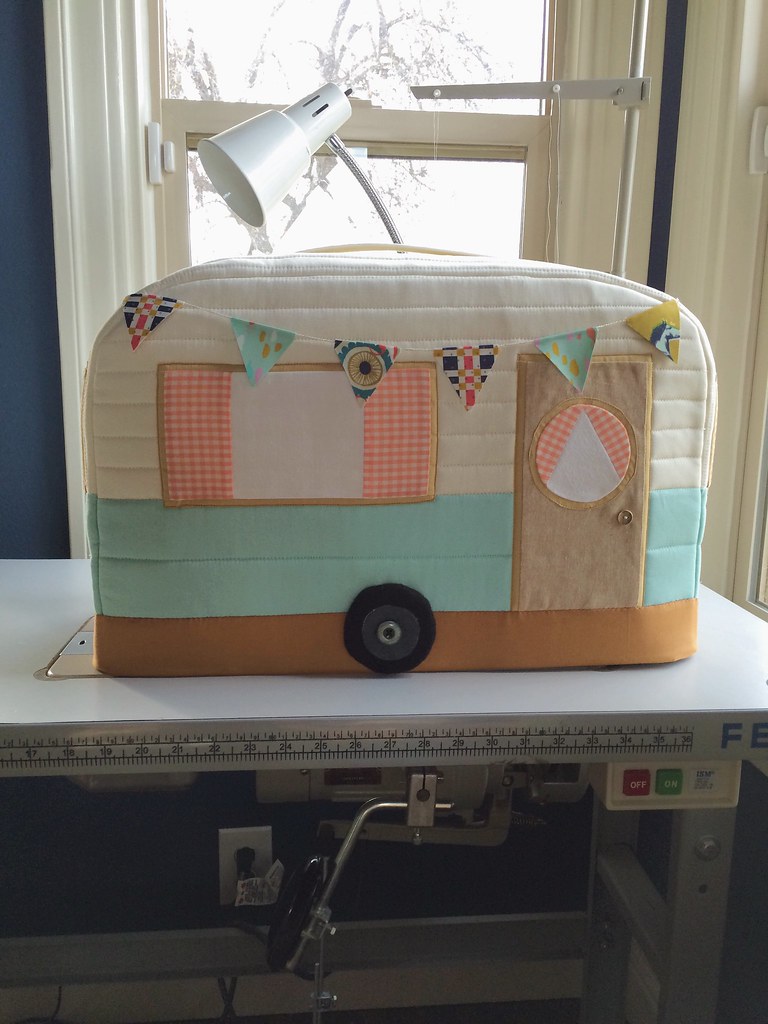
I am so pleased with the way this little project turned out. My Juki 8700 fits perfectly inside. I have been needing a cover for my machine for…I don’t’ know… ten years. Here she Is all tidy in her little house.
Note: I made some significant departures from the pattern regarding structure, but none to the appearance. the Original pattern can be found on Etsy by the Rainbow Hare. If you have any questions about the changes I made please comment or send me an email.
Hey Jenn,
The pattern doesn’t appear to be available via Craftsy anymore. Do you know where else I may be able to get it? I just love what you’ve done with it!! Thanks! – Abby
Hi Abby. Thank you for bringing to my attention that the link was no longer good. I’m not sure why the pattern was removed from Craftsy. I have emailed the pattern maker and I will get back to you as soon as I hear a response from her. Thanks for reading!
Hi Abby! I found another link to the pattern on Etsy. You can find the pattern here: https://www.etsy.com/listing/187737177/vintage-caravan-sewing-machine-cover?ref=shop_home_active_1
I love this. I just ordered the pattern. Can’t wait to get started. Yours look so cute. How do you like your juki. I was thinking of upgrading my machine and was interested in this machine. I want to machine quilt with it. Do you think it’s a good machine for that? Thanks for any input you can give me.
So sorry for the delayed response. I sent you an email regarding the machine. Hope it is helpful.
This is awesome! I recently jumped into full time RV living and made certain there was plenty of room for a sewing machine and supplies. Adding to my project list (and shopping cart!).
That is fantastic! What a fun way to live. Best of luck on your make. Tag me on Insta when you’re done so I can see 🙂
I LOVE your covers. They look fab and your tips for better rigidity are great. Thank you so much for sharing these. Happy Sewing! Janine 🙂
Thanks Janine! I’ve gotten such a wonderful response to your pattern. I’m making more as we speak 🙂
beautiful stuff you make! i love it! can you tell me more about your juki I’m interested in one and have been looking. i make bags and am running into issues
Of course! Thank you, I’d love to tell yo about my machine. I sing her praises to anyone who will listen. I have a Juki DDL-8700 Industrial Straight-Stitch machine. This machine is designed to sew garments. I use it to sew a little bit of everything including quilts. She is a no frills, all-mechanical machine. No computer. No bells and whistles. She sews forwards and backwards at up to 5500 stitches per minute. The knee-lift presser foot and feed dogs have a lot of power and can handle a lot of bulk with the right needles and thread. I love this machine because I sew lots of different kinds of things so this machine is perfect for me. If you are wanting to exclusively make bags a walking foot machine might be a better option for you. I always suggest that you go industrial as opposed to a domestic home sewing machine. This is especially true if you are making bulky bags with heavyweight material. The upside to going industrial is the machines are powerful and specialized so they are REALLY good at their specialized tasks. This is something I often sometimes find lacking in domestic machines. They are made to do too many different tasks and the result is that they never do any of them exceptionally well. Industrial machines also last FOREVER. A well cared for used one is just as good as new IMO. Check Craigslist. Probably the most surprising thing about them is how inexpensive they are compared to the highly advertised home sewing machines you see most often. The downside is that they are stationary. They need a dedicated space. The fact that they are specialized can also be a downside depending on your perspective. If you want a machine that does free-motion quilting or any kind of specialty stitches you are out of luck. Unless you keep your old one around for such purposes like I do ;-). Another thing you will have to learn if you get one of these is the ins and outs of tension. My machine is all mechanical and dealing with tension is a skill you have to hone with machines like this. That being said, I believe I am a better sewist for being “forced” to learn it. I hope that helps. If you have any other questions please ask. I’m happy to help.
Love it! I have seen this pattern before, but none so awesome as this. Wonderful job! Your structural changes really made a huge difference. It is tempting to ask how much you would charge to make me one LOL.
(I stumbled on this when looking for a cover or bag for my travel machine, since my monthly bee meetings have just moved to a quilt shop in an old covered house with a narrow stair case… my large Tutto bag is no good for that!)
Thanks Robyn! I’m so glad you like it :-). Although I flirted with the idea of selling these covers the truth is even when buying wholesale supplies I felt the cost and time outweighed the potential profit. They are a labor of love for sure. Also I like to make lots of different kinds of things and I was afraid of getting locked into making just this one item all the time. You know how creativity is…gotta flex those creative muscles and try new things. Lol. I’m not sure this would make a great item for traveling with your machine as it has no bottom. It’s mostly just for the purpose of making the sewing space pretty. Thanks again, I’m truly flattered by your comments.
Hi Jennifer,
I was just wondering if you sell these sewing machine caravan covers.
Thanks
Pete
So sorry Pete. Unfortunately I do not.
Found a photo of your caravan cover on Pinterest and right away fell in love with it! I spent last weekend working away on my own and I am trilled at how it is looking. I’m a little worried that it wont stay up on it’s own unless it’s on my machine but I think (hope) I’m ok with this in the end. I went for the hand sewing option for the windows and doors vs machine. Thanks for posting this and I found your comments to be very helpful!
Erin thank you so much! The first time I made this cover I followed the pattern to the letter and I had the same issue with it being a little floppy…hence the changes you see in the blog post. I’m so glad I was able to help. If you need any more advice or tips, please don’t hesitate to ask.
This is so cute and inspiring! Do you think it would be easy enough to alter the pattern to fit a different size machine? Mine is a few inches thicker then the dimensions in the pattern.
Thanks! 🙂
Absolutely Elaine. If your machine is thicker than the pattern allows all you would need to do is widen the piece that goes across the top and sides. You would need to alter that same dimension for all the fabrics that go into that piece but the front and back pieces should still fit together just as if you hadn’t altered it. Make sure you take into account any extra fabric and batting you might need to make the change. It wouldn’t be a lot extra but still something to consider. Good luck and thank you for your kind words!
Hello,
I am a very amateur sewer, straight stitch quilts on a cheap Brother sewing machine is all I’ve ever sewn, do you think this project is too advanced for a non sewer like me ( I still use liquid stitch sometimes for projects if that tells you anything..lol..but I love vintage campers, actually just got my very own 1977 GLAMPER that we are going to revamp ..I’m so stoked
Tracy to be honest some of the changes I made would not be do-able on the average home sewing machine. It has nothing to do with skill level, however. I sew on an industrial machine with a large motor and it can handle a lot of bulky fabrics. The good news is you can still make this caravan 🙂 Just follow the instructions as they are written in the pattern. Your caravan won’t be as sturdy as the one here just because I used more stabilizer but it won’t be any less cute either. Congrats on the new (to you) camper! What fun that will be.
I love this beauty cover, adorable! ❤ I’d like to make one for my machine, congratulate your talent. Have a nice day from Hungary ! 🙋
Would you be willing to make and sale me one?
Hmmm… Let me think on that and get back to you.
I am purchasing this pattern & plan to add a licence plate & slot for the handle as well. I’d love you advice on how you executed the handle slot changes. Did you use a welt pocket for the opening? Also do I need an special needle &/or presser foot for sewing with batting on a home sewing machine? Also so you think boning would also be a good choice for adding structure to the bottom?
I’m not sure what you mean by “handle slot changes.” For the handle I reinforced a strap with a strong fusible (Peltex 71F, I believe) and stitched it to the top panel of the caravan. For sewing with batting on a home sewing machine I recommend using a walking foot if you have one. Bear in mind, I used an industrial machine to make mine so a home machine might not be able to handle the same amount of bulk that I included with mine. Its always good to test what amount of bulkiness your machine can handle before you begin. Remember its not just the quilting that you have to to do. You will have to sew quilted pieces together. That will double up the bulk once again after the sides and top of the caravan are completed. I would use a 16 size needle and strong, bonded nylon thread, or upholstery thread. Lastly, adding boning is a good option I think but not imperative. I found it gave mine a nice shape but the right one will depend on how much stiffness your caravan has. Boning that is too weighty might look odd if you are only able to use say one or 2 layers of regular quilting batting. You will have to use your judgement depending on what amount of bulk your machine can handle before you decide which boning is right for yours. It may be so that simple plastic pieces you can buy at Joann may look better than the heavy gauge wires I used. I hope all that was helpful. So sorry for the delay in reply.