
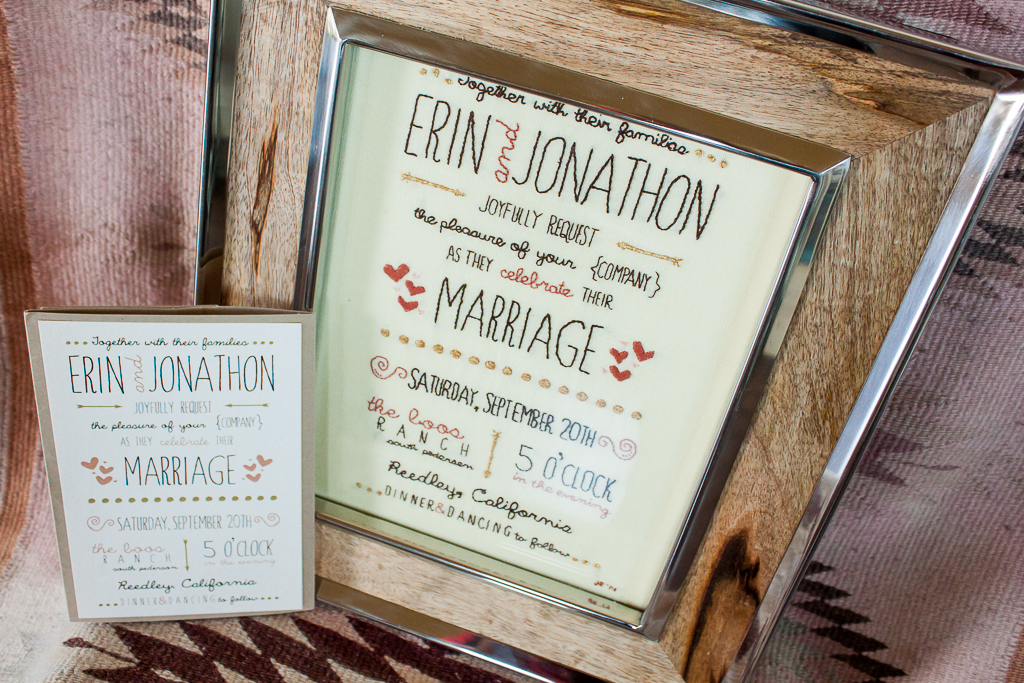
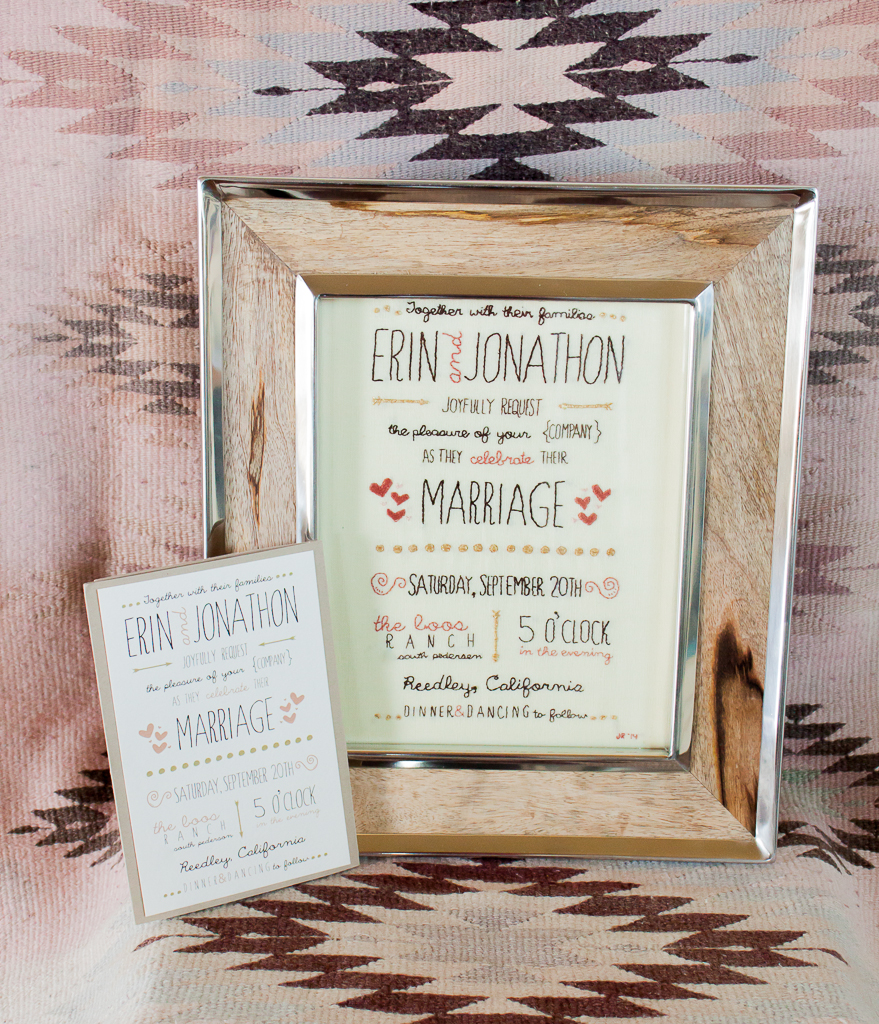
If I’ve said it once, I’ve said it a thousand times. I love handmade gifts. Probably most of what I do in my sewing studio is make things to give away. The idea for this gift came to me a few months ago and as soon as the this wedding invitation came in the mail I knew that It was the perfect test subject to see if this idea would work. Everything about it screamed, “Handmade!” to me. From the doodles to the hand lettered font I knew the feel of it would be preserved once stitched with needle and thread. It was a lovely wedding on a ranch in the country and I think this gift fit in perfectly with the aesthetic. What a fun personal gift to give someone as a reminder of their wedding day. I would have loved to receive a wedding gift like this so I knew I had to give it a try.
This is a versatile technique that I use for most of my embroidered projects. I used it to make the Love Note Quilt, and the quilt label for my Little Dreamer Baby Quilt. What I love about it is that you can take any written thing or drawing and it can be immortalized in thread. Embroider your child’s letters, drawings, doodles, whatever you like. Wouldn’t you love to see that stick figure drawing of your family from preschool stitched exactly as they drew it and framed on the wall? You get the idea. Endless possibilities and you don’t need to know any fancy or complicated stitches to make a very sweet and memorable gift for someone. Neither do you need a lot of money. Minus the frame this project probably cost me a couple of dollars to make and I had everything I needed already on hand. I love when inspiration strikes and I can go straight to work without running to the craft store.
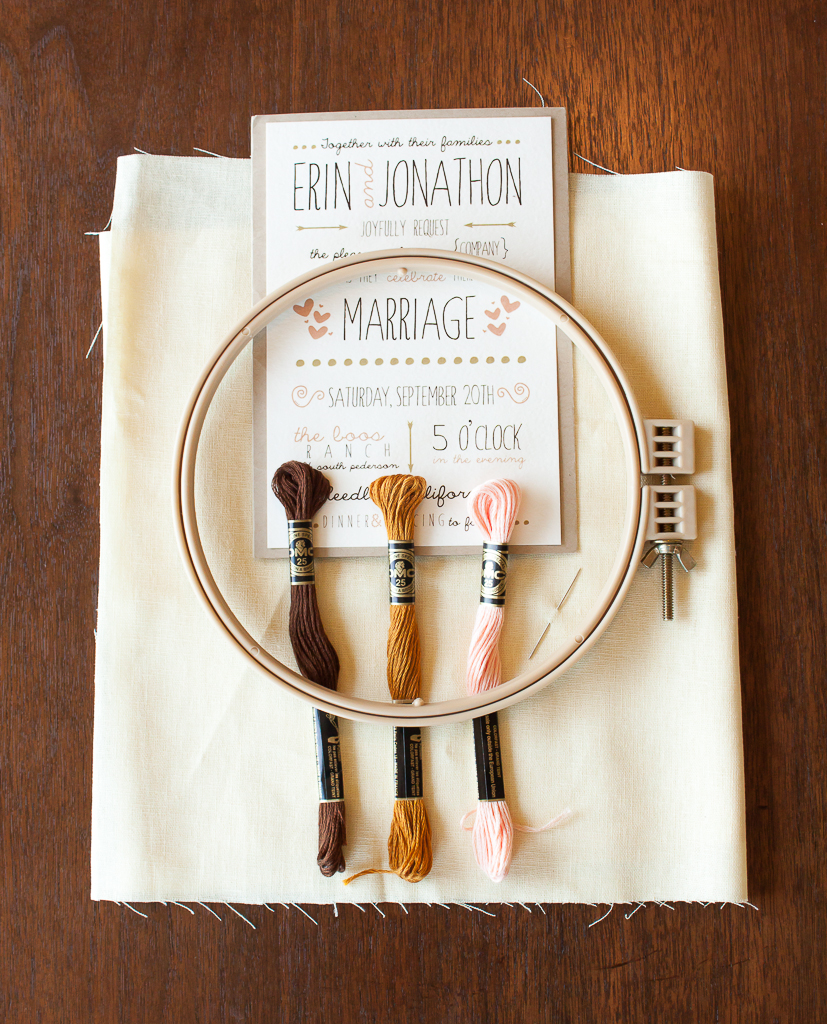
Supplies needed:
Fine woven fabric suitable for embroidery. (I used a fine linen)
Small embroidery hoop
Embroidery needle (has blunt tip and large eye)
Embroidery floss of your choice
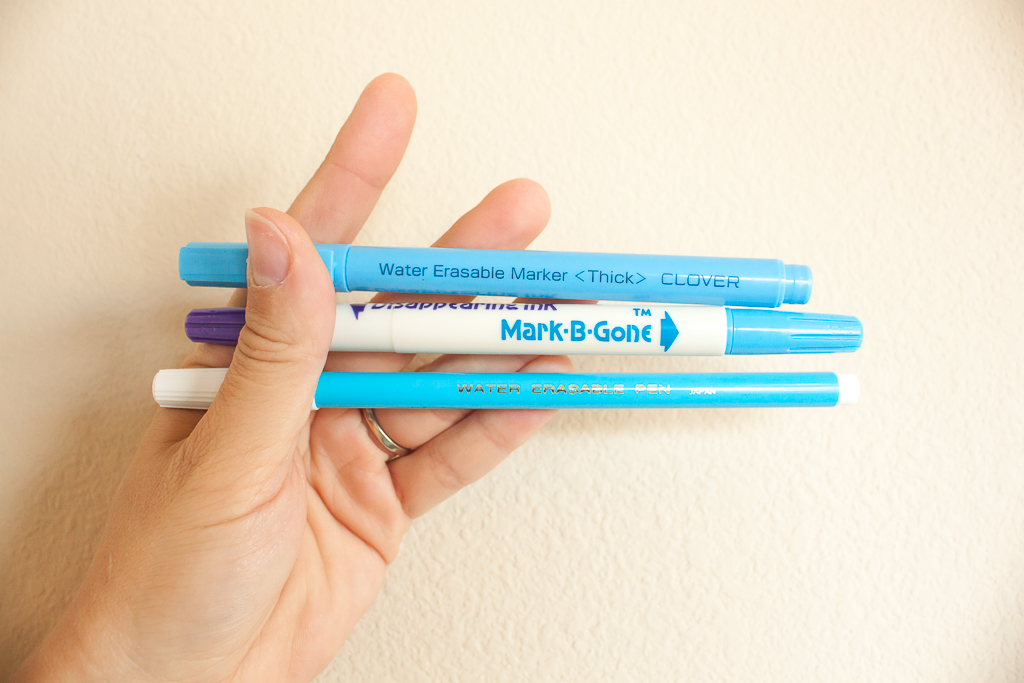
Water soluble fabric pen (any of the pens below would work, the finer the tip, the better)
spray adhesive and cardstock for mounting
Since it is very unlikely that you have a digital copy of what ever item you plan to work with the first thing you must do is scan the item so that you have a digital image that you can manipulate a bit. The actual size of this invite is a 5X7. I knew that some of the letters would be very difficult to reproduce if I didn’t make them larger. I scanned the invite into my computer as a .jpg but pdf image would work also. I found after trial and error that the default Dpi (dot per inch) setting was too low on my computer. if you are following this tutorial make sure you increase this setting to at least 300dpi or higher when you scan so you can see all the details when you increase the size of the image.
The next thing I did was open the image in Photoshop and resize it. I chose to increase the image size to an 8×10 for two reasons. One, I knew the letters would be big enough to embroider without making the overall image too large to realistically display in the home. The second reason is that I knew I would be able to find a frame I liked for the finished product at that size. If your image already has a high amount of contrast you may not need to do anything else other than print it out at this point. Because the image I was working with had colors I changed the colorspace to grayscale. After that I played with the settings to make the image as black-and-white as possible. This way the unsaturated pink colors in the invite were as dark as I could get them to be. The result was this final black-and-white image printed on standard computer paper.
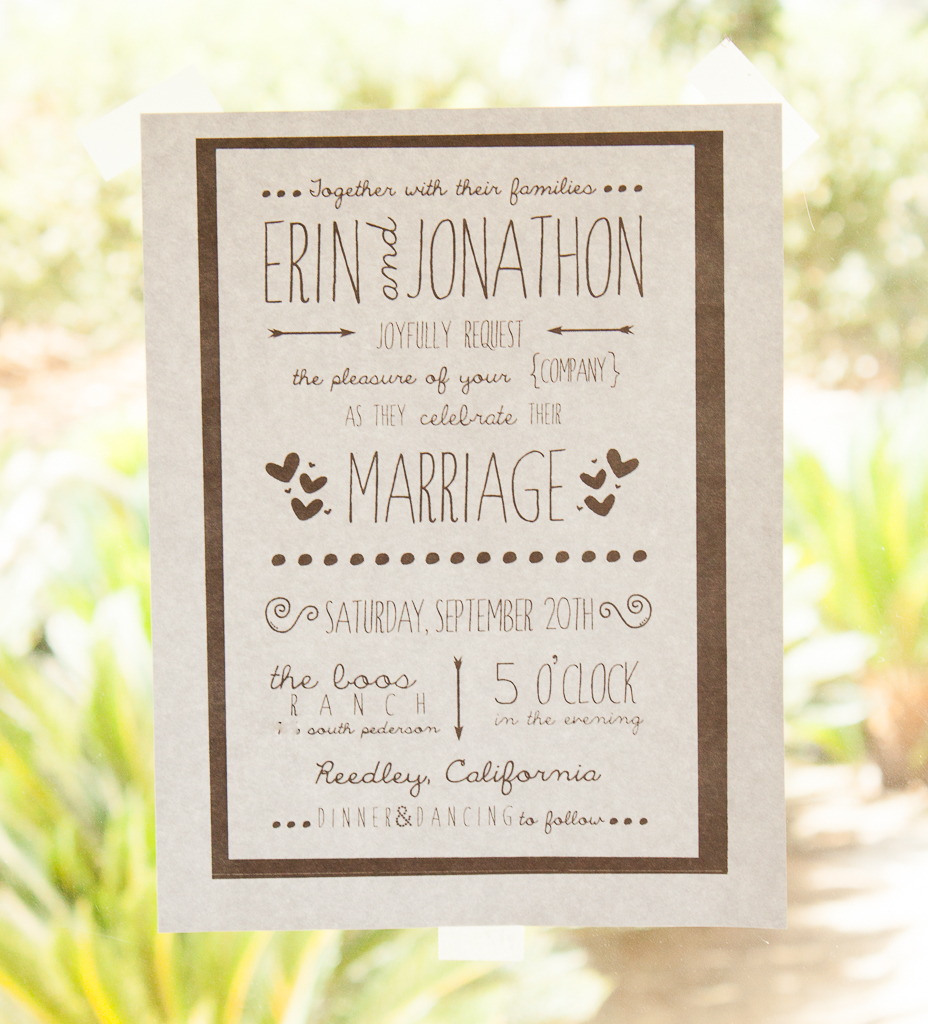
Next was to transfer the image from the paper pattern I had just made to the fabric of my choice. I chose a lovely fine-woven linen that I snagged in an Instagram destash recently. Choosing a suitable fabric is crucial for making the design look as close to the original as possible. This is especially true when the letters are small. The more finely woven he fabric the more detail you can incorporate from the original design because you have more options for thread placement. Too fine a thread count, however, you will need a magnifying glass to see the holes. Choose the finest woven fabric that you can see well enough to place your stitches. Using scotch tape, hang the page you just printed up in a well-lit window. Next, hang your fabric over the paper making sure you can see the design through the fabric as pictured below. It is best to have the grain of the fabric running vertically. Make sure that any vertical lines in your design line up with the warp threads of the fabric. This will ensure that your stitched lines are straight and not wobbly.

If you haven’t already, now is a good time to WASH YOUR HANDS. I say this because embroidered projects get handled a lot. It is a good practice to always wash your hands before you handle it because it is so easy for forgotten things (like making school lunches) to find a home on a project that you worked so hard on. Over a long period of time such things can make a finished project look dirty or dingy. Always wash your hands before you begin a stitching session. It’s a good habit and you will have better long-term results.
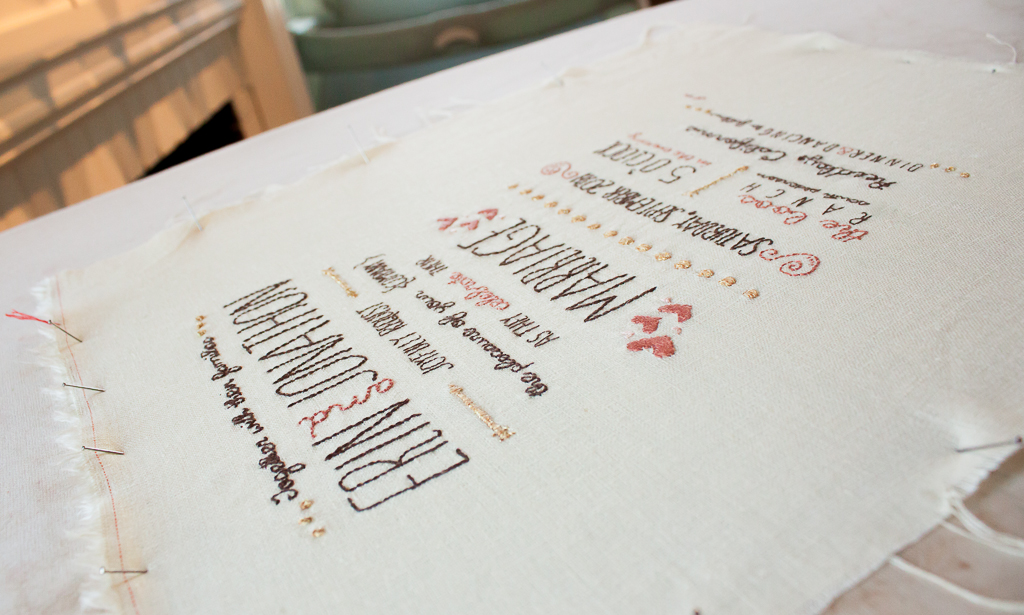
Using your water-soluble marker carefully begin to trace the design onto your fabric. Take your time. When you apply the pressure of the pen to the fabric it will cause the fabric to move slightly. Going slow and applying just enough pressure to transfer your design will help keep this to a minimum. Continue until you have transferred the design completely. As you go, continue to pay attention to how your vertical and horizontal lines of the text design fall on the warp and weft threads of your fabric.
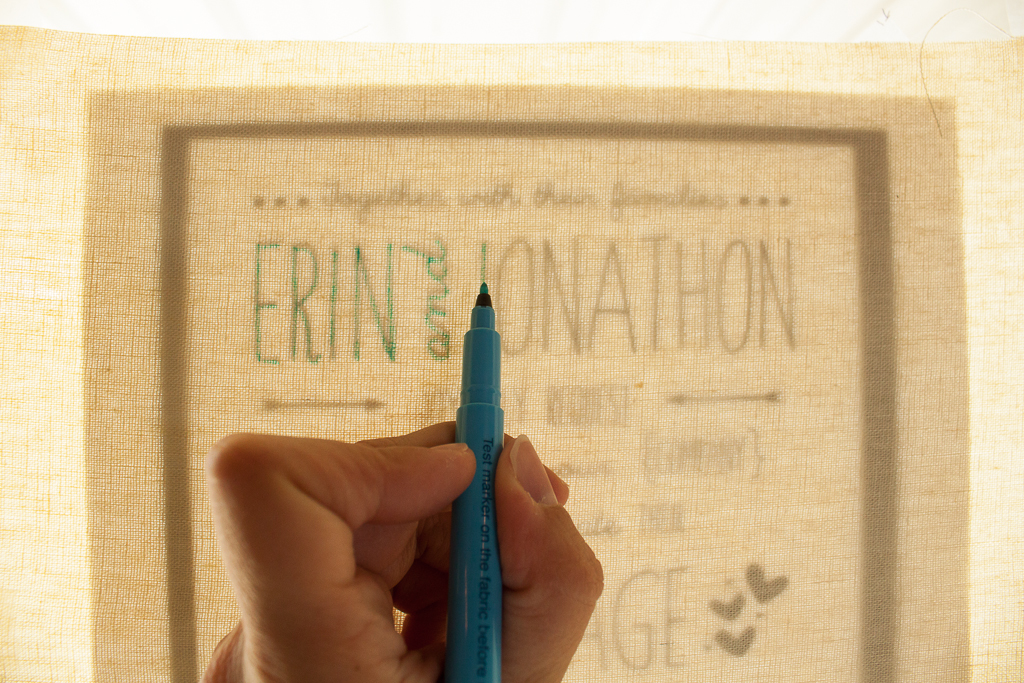
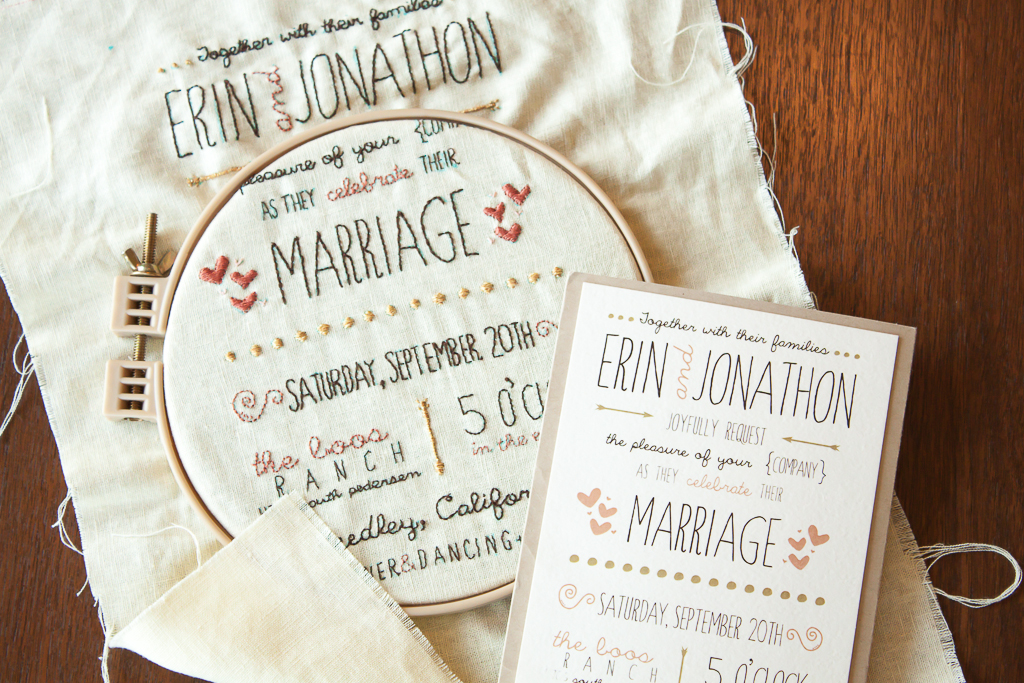
Now comes the fun part. Choose a section to start your stitching. I chose to embroider all of the dark brown letters first because it was the most prominent color used in the invitation design and also the most prominent words. Before I started I took note of the weight of the stroke used in various words of the invitation and decided which letters should have more or less ply-threads used to replicate the stroke weight of the originally printed words. Very thin and delicate (like the word “Ranch”) got one ply, heavier words like the wedding date got 2-ply, and only the names and the word “Marriage” got 3-ply. Using the markings that you traced, stitch the design onto your fabric, remembering to sign and date your work.
Once completed put a very small amount of gentle detergent into a baking pan or similar dish with cool water and gently wash your embroidered design. This is done to remove the water-soluble pen markings and remove any traces of oils or dirt that may have been transferred from your hands while stitching. Very gently manipulate in the pan for a minute or two, then dump detergent water and rinse design in the pan with clean running water.
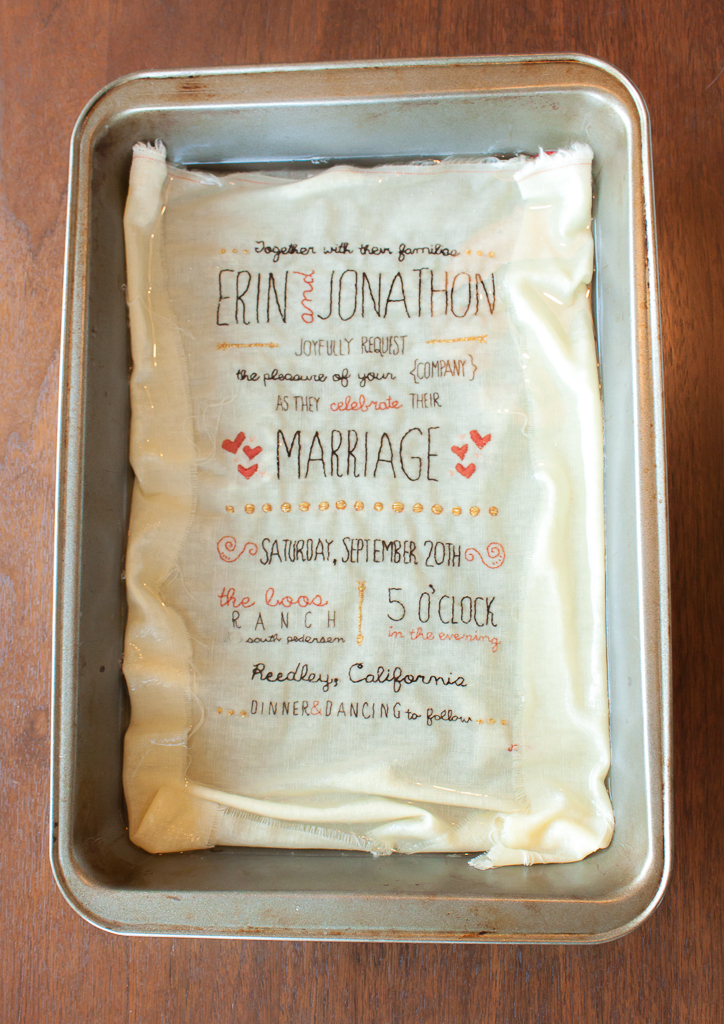
After the design has been washed, carefully lift it out of the pan, letting the water run out until as much water has drained from your embroidered design as possible. do not wad, twist or wring it out. Instead, spread it out on a clean, absorbent towel to air dry. Or, if you are impatient, like me, you can use a hair dryer on the cold setting.
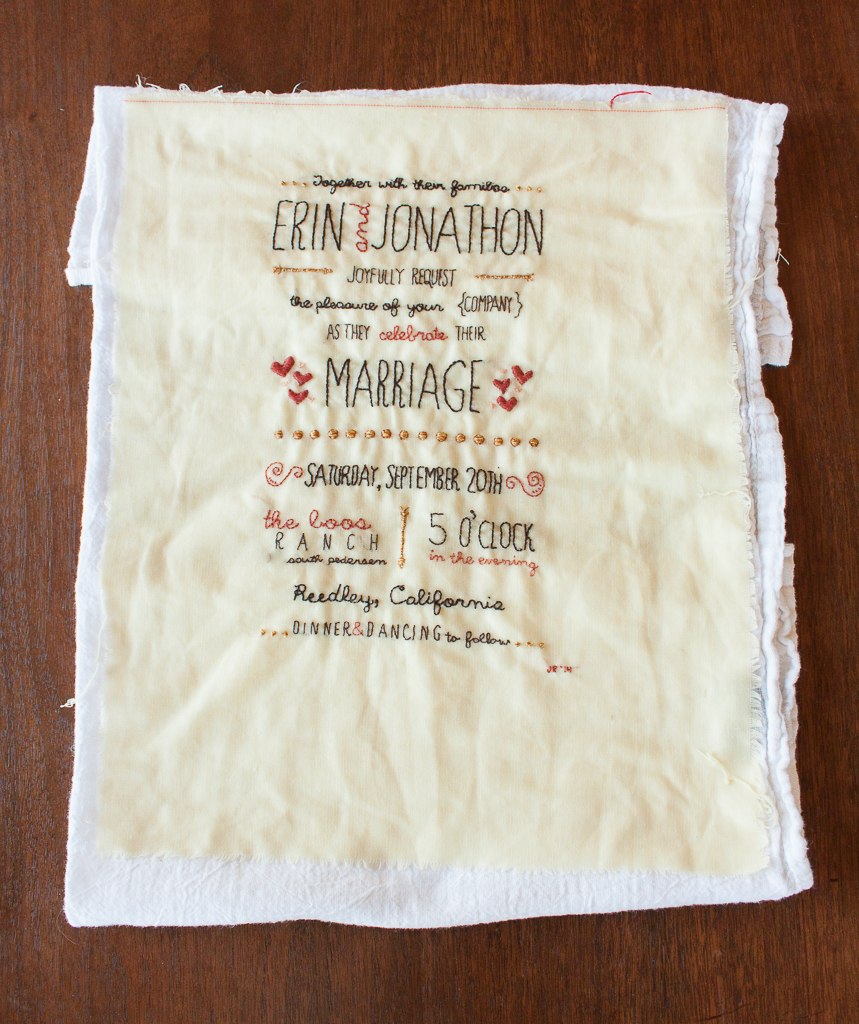
After the design is completely dry, spread it out on your ironing board and press it. I like to stretch it slightly with pins to make the fabric as flat as possible. After pressing allow to cool before removing the pins.
I mounted my design very simply using spray basting adhesive and an 8×10 piece of card stock paper and inserted it into the frame of my choice. I thought this lovely frame from Pottery Barn fit the aesthetic of the wedding perfectly.
I am so happy with the way this project turned out. It was exactly what I wanted it to be. It was a fun and relaxing way to spend a few evenings watching TV with my family and a wonderful personalized gift. I know the bride will love it and that makes me happy.
What an awesome idea! I love this!